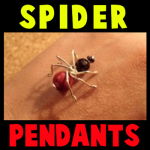
How to Make a Spider Pendant for Halloween

I have a treat for you crafters today….. I’m going to show you how to make a Spider Pendant for Halloween.  Made from jewelry wire and beads this Spider Pendant turns out beautifully.  Make it for yourself or as a gift for someone special…. they will surely love it.  What is awesome about this Spider Pendant is that you can wear it all year long…. not just for Halloween.  It turns out that amazing….. you don’t want to just save it for Halloween.  So, grab the materials needed and let’s get started.
Check out our other Halloween Crafts.

Laura from  Dacian Moon Handmade  will show you, step by step, how to make this Spider Pendant.


How to make Spider Pendants for Halloween


Materials Needed

– black crystal
– red coral (you can use any red bead, just keep in mind it should be bigger than the black one)
– 2 little beads (seed beads)
– one piece of wire (about 3 cm)
– 3 pieces of wire (about 4.5 cm)
– chain
– round nose pliers

NOTE: Wire should be neither too soft nor too hard.


Step 1

Take the small piece of wire…


…and begin making a loop on one end.


Put the 2 seed beads on it…


… and close the loop. These will be the eyes.


Step 2

Add the black crystal…


… and the red coral bead.


Using the pliers make another loop on the other end.


Take care to let about 5mm between the black bead and the red one.


Step 3

Take the 3 pieces of wire…


… and bend them in half, like this.


Continue to press on the ends until it looks like this.


Put the spider body through it, like this…


… and tighten the knot.


Press on the ends again…


… and make another knot, like this.

NOTE: It is not actually a knot. You just wrap the 3 wire around the spider body 2 times.


Step 4

Separate spider legs.


Fold down the first leg almost half (smallest side towards the body)…


… and make a little loop on the end, using the pliers.


Repeat for all the legs…


… and your spider is ready.


Add a chain to it (you can put it through the head – between the eyes) and is ready to be worn.


Ok, how awesome is this Spider Pendant?  It is perfect for the Halloween season…. or really any time of year.  It is that beautiful to wear… wear it all year long.

Technorati Tags: , , , , , , , , , , ,

How to Make a Butterfly Headband

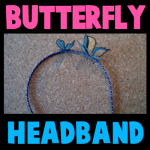
I have a fun craft for the girls today.  I’m going to show you how to make a butterfly headband.  This headband is perfect for any girl to wear who loves butterflies.  This headband can actually be worn in the hair and the butterflies stand up from the headband, so you will be able to see the butterflies no matter how thick your hair is.  This craft is not only useful, but it is also fun.  So, grab the materials needed and let’s get started.
Check out our other Crafts for Girls.

Laura from Dacian Moon Handmade  will show you, step by step, how to make this.


Butterfly Headbands


Materials Needed

– transparent foil (mine is backed with paper)
– craft glue
– pen
– headband
– scissors
– paint markers (or permanent markers): black, green, gold


Step 1

Use the pen to draw a butterfly on the transparency.


Like this.


… and another one, smaller…


… like this.


Step 2

Using the black marker…


…trace the contour of the first butterfly, and color the body.


If you want to make some black decorations on it, do that now. I made a line on both wings.


Trace the contour of the second butterfly too. Let them dry.


Use green marker to color them.


I added some green lines to the big one…


… and I made the second one completely green.


Use the gold marker to add highlights.


I added golden dots to the small one…


… and I colored the remaining places on the big one’s wings.

Let them dry well.


Step 3

Cut them out.


Like this.


Fold up the wings like this.


Step 4

Turn the big butterfly over …


… and add glue on its body…


… then place it on the headband.


Do the same with the small one…


… and the headband is ready.

Let it dry well before wearing.


And there you go…. you now have a beautiful headband decorated with butterflies.  What girl wouldn’t love wearing that?

Technorati Tags: , , , , , ,

How to Make a Fairy Skirt Costume for Halloween

Earlier today I showed you How to Make a Fairy Mask for Halloween.  But your Fairy Costume wouldn’t be complete if you didn’t have a Fairy Skirt to wear along with it.  I have an easy craft to show you how to make a Fairy Skirt using some green and cream tulle.  Tulle is a wonderfully light material perfect for Fairys.  After all, how else could a Fairy fly around like she does if she wasn’t wearing something light like Tulle.  Your little girl will love this fairy skirt…. she will surely use it well after Halloween is over for dress-up fun.   So, let’s get started.

Check out our other Halloween Crafts.

Laura from Dacian Moon Handmade   will show you, step by step, how to make it.


How to make Fairy Skirts for Costumes on Halloween


Materials Needed

– tulle : green and cream colored
– elastic cord
– scissors


Step 1

Cut strips of tulle with a width of 2 cm. The strips must be twice the length of the skirt.


Green and cream tulle…. When you think you have enough you can begin to assemble the skirt.


Step 2

Take the cord…


… and place it behind  one strip folded in half.


Bring the ends through the loop, over the cord…


… and pull to get a knot.


Add another one…


… and another one… and so on.


Take care to alternate the green and cream strips and all the knots to be oriented in one direction, for the strips to sit well.


Step 3

When you added enough strips, just tie the ends of the cord …


… and the skirt is ready.


 NOTE: I am using a doll as example, but the skirt is actually meant for girls.

What a beautiful fairy skirt to wear over leggings this Halloween.  Make sure to Make the Fairy Mask to wear with this Fairy Skirt…. it will complete your Fairy Costume this Halloween.

Technorati Tags: , , , , , , , , , ,

How to Make a Fairy Mask for Halloween

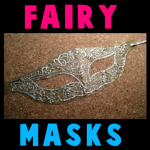
Little girls love to be Fairys.  They just do.  But, sometimes those store bought Fairy Masks can be a real nuisance to wear during Trick-or-Treating.  Well, I have a treat for you today.  I’m going to show you how to Make a Fairy Mask for Halloween.  This Fairy Mask is made with Tulle so it is wonderfully light.  Not like those plastic or vinyl store bought Fairy Masks…. this mask is simply beautiful.  Plus, your little girl will have a blast making her mask too…. almost as much as wearing it.  Keep an eye out as I will show you How to Make a Fairy Skirt Costume later today.

Check out our other Halloween Crafts.

Laura from  Dacian Moon Handmade  will show you, step by step, how to make this.


fairy-masks


Materials Needed

– mask template (you can download it from here)
– transparent foil
– scissors
– a piece of tulle
– silver textile paint
– silver ribbon
– tape


Step 1

Print the template and fix it on the table with tape.


Place on top of it the transparent foil and fix it with tape.


Over the foil place the tulle and fix it with tape also.


Now the setting is ready.


Step 2

Take the silver textile paint (multi-surface paint will work fine too)…


… and trace the pattern with it.


Take care to follow every swirl and every line and don’t touch the lines you already painted.


When you finish it will look like this. Let it dry overnight.


Step 3

Gently peel tulle away from the transparent foil.


It will look like this.


Cut out around the mask, including eye holes.


Like this.


Cut the ribbon in two and fix them with paint (or with craft glue) to the mask…


… like this.


Let it dry well and your mask is ready.


Didn’t this Fairy Mask come out amazing?!  Any Fairy would love to wear this Fairy Mask for Halloween.  Keep an eye out as I will be showing you How to Make a Fairy Skirt Costume next.

Technorati Tags: , , , , , , , , , ,

How to Make Spider Web Bracelets for Halloween

I have a fun girly craft for you today.  In this post I’m going to show you how to make a festive Halloween bracelet that any girl would love to wear this Halloween season.  Made from a recycled soda bottle and some paint this bracelet craft is an easy and fun one.  Plus, you will get a good feeling from recycling an old soda bottle instead of throwing it away.  Isn’t that wonderful?!  So, grab that cleaned out used soda bottle and let’s get this fun craft started.

Check out our other Halloween Crafts.

Laura from  Dacian Moon Handmade  will show you, step by step, how to make this.


How to Make Spider Web Bracelets for Halloween


Materials Needed

– recycled plastic bottle
– black multi-surface paint
– scissors
– nail file


Step 1

Cut the middle part of the recycled plastic bottle (the one without writing or patterns)…


… like this. Now you have the base of the bracelet.


Step 2

Round the edges using nail file.


Step 3

Take the lower part of the bottle…


And put the bracelet around it.   This will help you to paint it.


Step 4

Make a line on the lower part with the black paint.


Then, choose a point somewhere and make some rays around it, like this.


Connect them with curves, like this.


Continue until you have a full spider web.


I added two more smaller cobwebs on one side and the other.


Step 5

Let it dry overnight.


Take it off the bottle…


… and you have the coolest bracelet for this Halloween!


How cool is this bracelet?!  Any girl will love wearing this bracelet for Halloween.  And, I can promise you no one will have one exactly like it.  Enjoy!!

Technorati Tags: , , , , , , , ,

How to Make a Cheerful Lunch Box

In this post I’m going to show you how to make a fun and cheerful lunch box.  School has just started and one of the kids favorite times of day is lunch time.  You know what would make it more memorable for them is to make this lunch box craft with your child.  Your child will be so proud to take their homemade lunch box to school with them.  Plus, there will surely be no other person with a matching lunch box.  So, grab the materials needed and let’s get started.
Check out our other Back to School Crafts.

Laura from Dacian Moon Handmade   will show you, step by step, how to make this cheerful and girlish lunch box.


Materials Needed

– recycled box
– cotton cloth
– pen
– craft glue
– scissors
– tulle pieces
– bead
– needle and thread
– auto-adhesive crystal bead


Step 1

Cut 3 squares of tulle…


… place one on top of the other…


… and sew the bead on the middle…


… like this.


Step 2

Place the cloth over the box lid and mark the contour.


Cut it out…


… like this.


Sew the tulle flower on the middle of it…


… like this.


Step 3

Remove (as much as you can) the label on the lid, then add glue on it…


… like this…


… and place the decorated cloth on it.


Step 4

Now, that the lid is ready, is time to decorate the box.


Place the cloth over it and measure the height.


Cut a strip that measures that height.


Apply a layer of glue on it…


… and cover the box. I made some folds on the front to make it less plain.


Take the auto-adhesive crystal…


… and use it to highlight the folds.


Now the decorated lunch box is ready.


Now you have no ordinary lunch box.  You have a very girly and fun lunch box that no other person will have.  Enjoy it!!

Technorati Tags: , , , , , , , ,

How to Make a Clip Bookmark

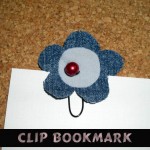
One thing I never can find when I need one is a bookmark.  And, you can always use a bookmark in school to mark your homework spot in your textbooks.  So because of that…. today I’m going to show you how to make a Clip Bookmark.  Not only is it super cute, but it is also super effective  in keeping your spot…. after all it is a clip that is sure to hold tight.  So, grab the materials needed for this craft and let’s get started.

Check out our other Bookmark Crafts.

Laura from  Dacian Moon Handmade  will show you, step by step, how to do this craft.


Materials Needed

– paper clip
– one piece dark denim
– one piece light denim
– glass pearl
– pen
– needle and thread


Step 1

Draw a flower on the dark denim…


… and a circle on light denim.


Cut them out.


Step 2

Take the flower…


… and sew the circle on it.


On the back we will place the clip and sew it there.


Turn the bookmark over. The stitches are visible, but we will mask that by sewing the glass pearl over them.


Like this. The bookmark is ready to use.


Wasn’t that easy?  And, so much fun!!  Now, you have an awesome Clip Bookmark perfect for bookmarking your homework spot in your textbooks.  Enjoy!!

Technorati Tags: , , , , , , , , , ,

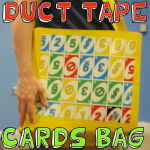
How to Make a Duct Tape Playing Cards Shoulder Bag

Oh boy…. do I have a fun craft for you today!!  I’m going to show you how to make a Duct Tape Playing Cards Shoulder Bag.  The front and back side of this durable bag is covered with playing cards to give it a playful style.  I used Uno Cards for this craft, but feel free to use any style playing cards you wish.  Whatever style you choose will look great.  So, grab a deck of cards, duct tape and scissors and you are good to go.  Let’s get started.

Check out our other Duct Tape Crafts.


How to Make a Duct Tape Playing Cards Shoulder Bag


Materials Needed

Deck of Cards

Purple & Yellow Duct Tape (or other colors you prefer)

Scissors


Step 1


Overlap 6 cards slightly.


Overlap 6 cards slightly.


Step 2


Duct tape these cards together.


Duct tape these cards together.


Step 3


Do this 4 times and then duct tape all together


Do this 4 times and then duct tape all together… Like this.  Duct tape only one side.


Step 4


Do step 1 thru 3 again so you have two of these.


Do step 1 thru 3 again so you have two of these.


Step 5


Make duct tape fabric.


Make duct tape fabric that is about this much bigger than the 2 card pieces you made.  ***Look below this step to see a detailed description on how to make Duct Tape Fabric***


How to Make Duct Tape Fabric


How to make duct tape fabric


  • Unroll a long piece of duct tape so that it is sticky side up.
  • Now place a piece of  duct tape, sticky side down, on top of the first piece of duct tape so that it is sealed closed.
  • Take a new piece of duct tape and place it sticky side up.  Now overlap the sealed piece of duct tape (from last step) slightly on top of this new piece, just enough so it will stick.
  • Take a new piece of duct tape and place it sticky side down on top of the piece of tape that is sticky side up.  Keep going until your duct tape fabric is as large as you need it to be.


Step 6


Place the purple pieces, card side down.


Place the purple pieces, card side down.  Place yellow piece on top of both… and then overlap a long strip of yellow duct tape over both yellow and purple fabric so they stick together.


Step 7


 Turn over and cover and add a piece of yellow duct tape, sticky side down, over both cards and yellow duct tape.


Turn over and cover and add a piece of yellow duct tape, sticky side down, over both cards and yellow duct tape.


Step 8


Pull yellow part up and duct tape to purple part like this.


The yellow part will be the sides of the bag.  Pull yellow part up and duct tape to purple part like this.  A friend should help.


Step 9


Now duct tape other yellow side up to purple fabric.


Now duct tape other yellow side up to purple fabric.


This is what you have done so far.


This is what you have done so far.


Step 10


Now tape the yellow part to the other purple side.


Now tape the yellow part to the other purple side.  Here is a pic looking down into the bag.


Step 11


This is what fronts of bag look like.


This is what fronts of bag look like.  We have to now tape edges of cards.


It should look like this now.


Like this.


Step 12


You might have these sticking up


You might have these sticking up….


Just fold them into the bag.


Just fold them into the bag.


Step 13


Make some more duct tape fabric.... make it long.


Make some more duct tape fabric…. make it long.  This will be the handle.


even longer than this


Nope…. even longer than this.


Step 14


Make a small slit, about 3 inches down on both sides of bag.


Make a small slit, about 3 inches down on both sides of bag.


Step 15


Duct tape all around hole so it won't rip later.


Duct tape all around hole so it won’t rip later.


Step 16


Place yellow strap in hole and tie large knot at end to secure in place.... do on both sides of bag.


Place yellow strap in hole and tie large knot at end to secure in place…. do on both sides of bag.


Step 17


It's done and ready to wear.


It’s done and ready to wear.

Isn’t this bag awesome?  It is so big that you can pretty much hold in it whatever you wish.  Enjoy carrying around this fun loving bag.

Technorati Tags: , , , , , , , , , , , , , , ,

How to Make Costume Hats

Costume hats are so much fun to make.  There are so many different hats you can make.  You can make a Medieval Hat or a Nurses Hat…. or maybe even a Pirates Hat.  If you are looking for different costume hats to make then you are going to love today’s post.  Today I have a printable diagram of many, many different Costume Hats you can make.  No matter what mood you are in you are sure to find a hat to fit your taste.  So, print of the printable diagram and get started making your hat today.

Check out our other Costume & Dressing Up Crafts.


How to Make Costume Hats


Click on the image below to make the diagram larger and to print off.


Make costume hat ideas


Leave a comment below and let us know what hats you decided to make.  Better yet, take a picture too and leave that with your comment…. we’d love to see them.

Technorati Tags: , , , , , , , ,

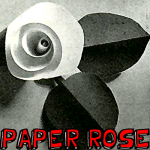
How to Make a Paper Rose

Today I’m going to show you how to make a paper rose.  Knowing how to make a rose out of paper can came into handy on special days like Mother’s Day, Valentine’s Day or even on someone’s Birthday.  With only a few materials you can learn how to make a beautiful rose that is good enough to give out on these special days.  So, grab the few materials needed and let’s get started.

Check out these other Flower Crafts.


How to Make a Paper Rose


Materials Needed

Any Color Paper

Green Paper

Pencil

Scissors

Ruler

Stapler


Step 1


Draw a spiral like this.


Draw a spiral like this.


Step 2


Cut out the spiral.


Cut out the spiral.


Step 3


Roll paper with ruler


Roll paper with ruler… then when flexible roll with hands.


Step 4


The outside edge is now pushed down thru center.


The outside edge is now pushed down thru center.


Step 5


Staple base together.


Staple base together.


Step 6


Fold a piece of paper in half and cut half of a leaf shape


Fold a piece of paper in half and cut half of a leaf shape (as seen above).


Step 7


Roll leaves a bit.


Roll leaves a bit.


Step 8


Staple or tape leaves on rose.


Staple or tape leaves on rose.

And, that’s it…. you just made a paper rose.  Isn’t it beautiful?  Now, the real question is…. who are you going to give it to?  hmmmmmm……

Technorati Tags: , , , , , , , , , , , , ,

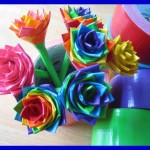
Awesome Crafts Made with Duct (Duck) Tape


Awesome Crafts Made with Duct (Duck) Tape


Duct tape is commonly used in situations that require a strong, flexible, and very sticky tape.  When I originally thought of Duct Tape I thought of construction workers and fathers using duct tape to fix things.  As a matter of fact, my father could use duct tape to fix anything.  Well, that is what he thought…. most things were not fixed at all.  Well, that’s a whole other story.   Today’s post is about duct tape, but not duct tape used in that way.  No, today’s post is about Awesome Crafts made with Duct (Duck) Tape.  Here in this post I have looked around the internet and found some amazing duct tape crafts that are made by some creative people.  You have to check them out.  I have Duct Tape crafts that you can wear and I have Duct Tape crafts that you can play with….. you are sure to find here duct tape crafts that you will enjoy.  So, let’s get started.

Awesome Crafts Made with Duct (Duck) Tape

(1)  Baseball Cap


Duct Tape Baseball Cap


It’s Spring time.  And, in Spring there is something that I can’t get enough of…. Baseball.  But, you can’t go to a baseball game without wearing a cap.  Well, here is a baseball cap I would be proud to wear…. a Duct Tape Baseball Cap.  Check out Duck Brand for the full instructions on how to make this for yourself.


(2)  Bowling Pin


Duct Tape Bowling Pin


Do you like bowling?  Do your kids like bowling?  Well, how about making these duct tape bowling pins for an indoor bowling game…. that would be so much fun.  It is incredible how creative people can be….. just look at this awesome bowling pin.  Make sure to go to Duck Tape Fun for all the details.


(3)  Duct Tape Dress


Duct Tape Dress


Do you have somewhere special to go…. but nothing to wear?  Well, check out this beautiful dress made out of duct tape.  I found this duct tape dress over at Craftster and it is really something.   She explains how she used garbage bags, streamers and duct tape to make this beautiful dress.


(4)  Duct Tape Wallets


Duct Tape Wallets


These aren’t your standard gray duct tape wallets…. these are super colorful and wild duct tape wallets.  I love them!!  And, the cool part is that you can actually hold your money and cards inside of them.  Make sure to check out Crafty Nest for all the fun crafting details.


(5)  Valentine Heart


Duct Tape Valentine Heart


It is true that the best gifts are not the ones bought, but the ones that were made from scratch.  Well, how about showing your love with this Duct Tape Valentine’s Heart.    It is pretty much a duct tape stuffed item and it is super duper cute.  Make sure you check out Duck Brand for yourself.


(6)  Bedroom Accessories


Duct Tape Bedroom Accessories


Now, these bedroom accessories are absolutely adorable.  Who would have thought they are made from Duct Tape.  She used the zebra print duct tape for this project and with the pink pop of color these accessories couldn’t look any better.  Check out House of Hepworths for all the crafty details.


(7)  Duct Tape Hair Bow


Duct Tape Hair Bow


This bow is BEAUTIFUL and it is made out of duct tape….. who would have thought that the word “beautiful” and “duct tape” could appear in the same sentence.  But, apparently they have.  I found this duct tape craft over at HubPages and Daisy Mariposa explains in great detail how you too can make this duct tape hair bow.


(8)  Duct Tape Tote Bag


Duct Tape Tote Bag


This Duct Tape Tote Bag is one of our crafts that we did a little while ago.  This tote bag is made completely out of duct tape….  nothing else.  And, believe it or not it is amazingly strong.    You can even use it for carrying your groceries…. it’s just that strong.  Make sure to check out our post “How to Make Duct Tape Tote Bags” and make one of these duct tape tote bags for yourself.


(9)  Duct Tape Clutch


Duct Tape Clutch


What an amazing purse!!  It is pretty incredible and it is, of course, made out of duct tape.  The crafter made it out of different color duct tape to give this duct tape clutch a colorful look.  I just love it!!  JoAnn has all the details.  Make sure to go to that site and check it out for yourself.


(10)  Duct Tape Flip-Flops


Duct Tape Flip-Flops


These flip-flops are just so adorable….. they are really, really cute.  And, the flower and straps are made from purple duct tape.  They are just so cute!!   I found this duct tape craft over at Skip To My Lou ….. make sure to go there and check it out to find out how she took an ordinary pair of flip-flops and made them special with duct tape.


(11)  Duct Tape Sun Hat


Duct Tape Sun Hat


If you want to see a truly adorable craft that was made from duct tape then you have found it here.  100 Directions shows you how you can take Hello Kitty Duct Tape and some hot pink Duct Tape and you can make it into these cutie patootie sun hats…. just brilliant.  Make sure to check out the craft for yourself.


(12)  Duct Tape Rose Wreath


Duct Tape Rose Wreath


This amazing Rose Wreath is beautiful enough to be hung on any door anytime of the year….. it is just that attractive.  And, it is made of Duct Tape, of course… Otherwise it wouldn’t be in this post.  I found this duct tape craft over at Poppies at Play…. check it out because she gives a really excellent tutorial.


(13)  Duct Tape Rings


Duct Tape Rings


Aren’t these rings adorable?  They really truly are.  No one would believe that these rings are a duct tape craft…. but they are.  Any girl would love not only crafting them, but wearing them too.  Make sure to check out Living Locurto for all the fun crafting details.


(14)  Duct Tape Flower Pens


Duct Tape Flower Pens


These Duct Tape Flower Pens are so cute….. what girl wouldn’t love using these pens to write?  I think they would all love using them.  I love how she used all different color duct tape to make the flowers…. it just makes them even more colorful and lovely.  Make sure you check out Seven Sisters so you too can make these.

Technorati Tags: , , , , , , , , , ,

How to Make Cone May Baskets

I have a fun craft for you that will totally get you in the Spring mood.  I’m going to show you how to make a Cone May Basket.  May is all about the Spring flowers.  Well, imagine how beautiful a basket will be filled with some of those magnificent flowers.  Or, perhaps you want to give this Cone May Basket to someone special…. well, why not fill it with candy.  The receiver will surely love it!!  Either way this Cone May Basket will surely be enjoyed.  So, grab the materials needed and let’s get started.

Check out our other Spring Crafts.


How to Make Cone May Baskets


Materials Needed

Printer

Paper

Scissors

Crayons or Markers

Paste

Items to Fill the Basket With


Click on template images below to make larger and to print.

8×11 Template


May Basket Template 8x11


Larger Template


May Basket Larger Template


Step 1


Print out template.


Print out template.


Step 2


Cut out pattern.


Cut out pattern.


Step 3


Decorate paper.


Decorate paper.


Step 4


Fold to look like image above.  Paste the tab to the other edge.


Fold to look like image above.  Paste the tab to the other edge.


Step 5


Cut a long strip of paper and use for the handle.


Cut a long strip of paper and use for the handle.  Paste the handle.


Step 6


Fill with flowers or treats.


Fill with flowers or treats.  Now your basket is finished.  What did you fill your basket with?  Are you keeping it for yourself or are you giving it away as a gift this May?  Let me know in the comments below.

Technorati Tags: , , , , , , , , , , , ,

How to Make a May Basket

I have a fun and easy craft for you today.  In this post I’m going to show you how to make a May Basket.  This craft is a great craft for even the youngest of crafters as we will be using a template for this craft.  Simply print out the template, cut, fold and glue and that’s it.  Of course, you are going to want your May Basket to be pretty so make sure to color and decorate it the way you see fit.  So, grab the materials needed for this craft and let’s get started.

Check out our other Spring Crafts.


How to Make a May Basket


Materials Needed

Printer & Paper

Scissors

Markers or Crayons

Paste


Click on the template images below to make larger and to print.

8×11 Size Paper

May Basket Template


Larger Paper

May Basket Template Large


Step 1


Print out template.


Print out template.


Step 2


Cut out the pattern on the black lines.


Cut out the pattern on the black lines.


Step 3


Decorate the basket.


Decorate the basket.


Step 4


Fold on the dotted lines.  Paste edges.


Fold on the dotted lines.  Paste edges.

You finished your May Basket….. great job!!  Now, fill your basket with something for Spring.  How about fill it with some beautiful flowers…. you can’t get more Spring than that.

Technorati Tags: , , , , , , , ,

How to Make a Sock Baby Doll

I have a fun craft for you today.  In this post I’m going to show you how to make a Sock Baby Doll.  That’s right…. it’s a baby doll made out of a sock.  This craft is a great way to put to use those socks that no longer have a match.  Plus, you probably have all the materials needed for this craft in your house… so no need to buy any more materials.  Give this sock baby doll to your best friend…. or better yet keep it for yourself.  The choice is yours.  So, let’s get started.

Check out our other Sock Crafts or Doll Making Crafts.


How to Make a Sock Baby Doll


Materials Needed

Sock

Scissors

Needle & Strong Thread

Stuffing

Black Marker (optional)


Step 1


Cut a sock where you see dashed lines


Cut a sock where you see dashed lines… to look like this…


After cutting, the above pieces are what you should see.


After cutting, the above pieces are what you should see.


Step 2


Turn sock so top hole is in the front as in image B.


Turn sock so top hole is in the front as in image B.


Sew front and back of each leg together as shown.


Sew front and back of each leg together as shown.


Step 3


Stuff the legs and sew hole closed.


Stuff the legs and sew hole closed.


Step 4


Turn doll around so that sewn up hole is in the back.


Turn doll around so that sewn up hole is in the back.  Gather and draw in with strong thread the section shown in the image above.


Step 5


Draw or sew a face on.


Draw or sew a face on.


Step 6


Fold each square in half.


Fold each square in half.


Sew sides with dashed lines.


Sew sides with dashed lines.


Fill with stuffing.


Fill with stuffing.


Sew shut.


Sew shut.


Step 7


Sew on arms.


Sew on arms.

Awesome job…. you just finished making your Sock Baby Doll.   How did your baby doll turn out?  Let me know in the comments below.  Also, take a picture of your sock baby doll and add that to your comment as well… I’d love to see it.

Technorati Tags: , , , , , , , , ,

How to Make Paper Strip Belts and Bracelets

In this post I will be showing you how to make a Paper Strip Belt or Bracelet.   The choice is really yours weather you make a belt or a bracelet.  You simply will need to adjust the amount of colored paper you use for the project…. less for the bracelet and more for the belt.  Make a few and give them to your friends or loved ones…. anyone would be sure to enjoy them.  So, grab the materials needed and let’s get started with this fun craft.

Check out our other Friendship Bracelet Instructions.


How to Make Paper Strip Belts and Bracelets


Materials Needed

Thin Colored Paper, Magazine or Cellophane

Cord or Ribbon


Step 1


Thin colored paper, colored magazine pages or cellophane may be used.


Thin colored paper, colored magazine pages or cellophane may be used.  Plan 1 pattern for each inch.


Step 2


Fold on 'A' and 'B' toward 'C'.


Fold on ‘A’ and ‘B’ toward ‘C’.


Step 3


Fold again on 'C'.


Fold again on ‘C’.


Step 4


Fold on center.


Start with about 25 of these.  Fold on center.


Step 5


Fold both ends toward the center.


Fold both ends toward the center.  Completed.


Step 6


Slip one link through the loops of another like a hairpin.


Slip one link through the loops of another like a hairpin.


Step 7


Continue until the length you desire is completed.


Continue until the length you desire is completed.


Step 8


Tie a cord or ribbon on end loops.


Tie a cord or ribbon on end loops.


Completed Paper Link Belt or Bracelet


And, there you go…. you just finished making your Paper Strip Belt or Bracelet.  Wasn’t that fun?  The question I have for you though is…. Did you make a belt or a bracelet?  Let me know in the comments below.  Wear it proudly.

Technorati Tags: , , , , , , , , , , , , , ,

How to Make a Personalized Journal

Spring and summer is coming up.  And, one of the best parts of Spring and Summer is that the weather is usually beautiful enough to get outside and have adventures.  Why not record your adventures so you are able to look back at them and relive your adventures for years to come.  How do you do that?  With a Journal, of course.  A journal is like a diary…. it is a place to record your daily doings so that you can read them later and remember those times.  Today I’m going to show you how to make a Personalized Journal.  So, grab the materials needed and let’s get started.
Check out our other Keepsake Craft Ideas.

Laura from Dacian Moon Handmade will show you how to make this journal step-by-step.


Materials Needed

– blank journal / notebook
– dried plants (you can gather yourself or buy a potpourri – I used orange, brown and yellow plants)
– 1 polymer flower (or plastic, glass…)
– one auto-adhesive crystal
– colored pens
– one pencil
– glue


Step 1

Using the pencil make a sketch of how you want the journal to look like.


Step 2

Use the appropriate colors to give life to the sketch. I used red for the contour…


… and for the lace style drawing.


Step 3

Use green to make twigs and leaves.


Step 4

In the middle you may want to write “Summer Journal” like I did…. or whatever title you would like.


Step 5

Let’s place the auto-adhesive crystal under the title.


Step 6

Add a layer of glue on the polymer / plastic / glass flower…


… and place it on one exterior corner.


I added glue on two orange dried leaves…


… and placed them beside the flower.


Step 7

Take the brown dried plants,  glue them…


… and place them on the next corners.


Step 8

In the opposite corner glue another orange leaf.


You can add the yellow one beside the crystal.


Or you can make a completely different design as long as you have fun.  How did your Personalized Journal turn out?  Did you make it like my design or do something different?  Let me know in the comments below.  Make sure to take a picture of the journal too and add it to the comment….. I’d love to see it.

Technorati Tags: , , , , , , , , , ,