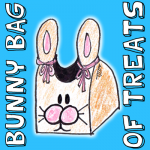
How to Make Bunny Rabbit Treat Bags for Easter

Instead of using an Easter Basket to give out Easter treats to people, have you thought of using a Treat Bag?  Today I’m going to show you how to make a Bunny Rabbit Treat Bag for Easter.  These are great if you have a bunch of people to hand out candy to.  Instead of buying an Easter Basket for everyone…. why not just make these cute Bunny Rabbit Treat Bags.  They are super easy and a ton of fun…. plus they are super cute.  So, grab the materials needed and let’s get started.
Check out our other Easter Crafts.


How to Make Bunny Rabbit Treat Bags for Easter


Materials Needed

Brown Bag

Pencil

Scissors

Black Marker

2 Pom Poms

Treats

2 Ribbons


Step 1


Draw top of bunny's head all around a brown bag.


Draw top of bunny’s head all around a brown bag.


Step 2


After cutting out it will look like this.


Cut out the top of the bunny heads you just drew.  After cutting out it will look like this.


Step 3


Draw 2 ovals for eyes


Draw 2 ovals for eyes, draw 3 lines for whiskers and add 2 pom poms where shown.


Step 4


Add treats


Add treats.  Once you have added the treats tie both ears shut on each side.

That’s it!!  You just finished your Bunny Rabbit Treat Bags for Easter.  Now, give this Bunny Rabbit Treat Bag to the receiver….. they are sure to love it!!

Technorati Tags: , , , , , , , , , , , , , ,

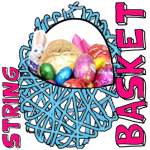
How to Make a Glued String Easter Basket

Today I have a fun and creative craft for you.  In this post I’m going to show you how to make a Glued String Easter Basket perfect to fill with Easter eggs and candy.  The Easter Basket turns out beautifully and it is simply made with a balloon, yarn, flour and water.  Don’t use the same boring Easter Baskets that every child uses from the store…. make your very own Glued String Easter Basket.  The Easter Bunny will love it.  So, let’s get started.

Check out our other Easter Crafts.


How to Make a Glued String Easter Basket


Materials Needed

Balloon

Flour

Water

Shallow Bowl

Yarn

String

Needle

Scissors


Step 1


Blow up balloon and tie a knot at the end.


Blow up balloon and tie a knot at the end.  Tie a string to this, and hang it from an overhead point, so that it is about eye level for the child.


Step 2


Mix flour and water.


Mix flour and water.  Do this by mixing 1/4 cup of flour into 1 cup of water. You will want the mixture to be thin-sh and a bit runny.


Step 3


Dip the yarn into the flour mixture


Cut yarn in lengths of about 4 feet lengths. Dip the yarn into the flour mixture and wet each piece of yarn thoroughly.


Step 4


Start at top and criss-cross.


Start at top and criss-cross.


Step 5


Wrap more yarn around balloon and then you should pop the balloon.


Wrap more yarn around balloon and then you should pop the balloon.


Step 6


Cut top side of string on both sides to make basket.


Cut top side of string on both sides to make basket.

And there you have it…. you just made a Glued String Easter Basket.  How did it turn out for you?  Let me know in the comments below.  And, make sure to take a picture of your Easter Basket too and share it in the comment…. I’d love to see it.

Technorati Tags: , , , , , , , , , , , , ,

How to Make a Bunny Rabbit with Food for Easter

I’m sure you have all heard of the edible Easter Bunnies you get for Easter…. they are usually milk chocolate bunnies or white chocolate bunnies.  Well, today we are going to make an edible Easter Bunny, but it is going to be made with fruits and vegetables.  That’s right…. I’m going to show you how to make a Bunny Rabbit with Food for Easter.   When you are finished making the Easter Bunny you can display it proudly as an Easter decoration or eat it up… the choice is yours.  So, let’s get started.

Check out our other Easter Crafts.


How to Make a Bunny Rabbit with Food for Easter


Materials Needed

4 Toothpicks

Grapefruit

Orange

2 Lettuce Leaves

Black Marker

Marshmallow


Step 1


Stick toothpick on top of grapefruit.


Stick toothpick on top of grapefruit.


Step 2


Push orange on top of toothpick.


Push orange on top of toothpick.


Step 3


Use a lettuce leaf for each ear.


Use a lettuce leaf for each ear.  Secure with 2 toothpicks.


Step 4


Use a black marker to draw 2 eyes and a nose


Use a black marker to draw 2 eyes (ovals) and a nose (rounded triangle).


Step 5


Now draw a line and dots.


Now draw a line and dots.


Step 6


Use a marshmallow for tail.


Use a marshmallow for tail… secure with toothpick.

And, that’s it….. you just finished making your Bunny Rabbit with Food for Easter.  Now display it proudly for all to see.

Technorati Tags: , , , , , , , , , , , , , , , ,

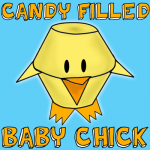
How to Make Candy Filled Baby Chicks for Easter

Are you looking for a way to hand out the Easter Candy this year instead of using the normal Easter eggs?  Well, then I have the craft for you today.  In this post I will be showing you how to make Candy Filled Baby Chicks for Easter.  Make a few and give them to your friends and loved ones this Easter.  Or, if you are having guests over for Easter why not use these Candy Filled Baby Chicks for the Children’s table.  They are sure to be a huge hit.  So, let’s get started.

Check out our other Easter Crafts.


How to Make Candy Filled Baby Chicks for Easter


Materials Needed

Egg Carton

Scissors

Tape

Yellow Paint

Orange & Yellow Construction Paper

Glue

Black Marker


Step 1


Cut up an egg carton so you have 2 cups.


Cut up an egg carton so you have 2 cups.


Step 2


Tape 2 cups together to act as a hinge.


Tape 2 cups together to act as a hinge.


Step 3


Paint yellow.


Paint yellow.


Step 4


Cut out 2 yellow and 2 orange shapes


Cut out 2 yellow and 2 orange shapes (a triangle with a square under it).


Step 5


Attach 4 triangles to the carton cups with glue or tape.


Attach 4 triangles to the carton cups with glue or tape.  Notice orange ones are for beak and yellow ones are for wings.


Step 6


Draw on eyes.


Draw on eyes.


Step 7


Cut feet for the chicks by a letter W with an extra hump.


Cut feet for the chicks by a letter W with an extra hump.


Attach feet to chick with tape or glue.


Attach feet to chick with tape or glue.

Now fill with candy and give this Candy Filled Baby Chick to someone special this Easter.  Or, if you are having Easter Dinner at your house set these Candy Filled Baby Chicks at the Children’s table…. they are sure to love them.

Technorati Tags: , , , , , , , , , , ,

How to Make Sugar Cookie Leprechauns for St. Patrick’s Day

Today I’m going to show you how to make Sugar Cookie Leprechauns for St. Patrick’s Day.  We will be decorating Sugar Cookies with Icing.  In order to do this Sugar Cookie Craft correctly please check out the following post, “How to Decorate Cookies with Royal Icing”.  In that post, Sweetopia shows you how to decorate cookies with the Flood Icing technique…. that is the technique we will be using for these Leprechaun Cookies.  So, let’s get started.

Check out our other St. Patrick’s Day Crafts.


How to Make Sugar Cookie Leprechauns


Materials Needed

Sugar Cookies

Green Icing

Black Icing

Yellow Icing

Orange Icing (optional)


Step 1


Buy sugar cookies.


Buy sugar cookies.


Step 2


color half of a circle shape green at top of the cookie.


Firstly, color half of a circle shape green at top of the cookie.


Step 3


Draw a thick curved black line.


Draw a thick curved black line.


Step 4


Draw 2 ovals for eyes and a letter U shaped nose.


Draw 2 ovals for eyes and a letter U shaped nose.


Step 5


Draw yellow square over black belt.


Draw yellow square over black belt.


Step 6


Outline some items in black if you want to


Outline some items in black if you want to.  You could also add eyebrows and a beard if you wish.

And, there you have it… you just made your super yummy Sugar Cookie Leprechauns for St. Patrick’s Day.  Didn’t they come out cute?  They are almost too cute to eat….. almost.

Technorati Tags: , , , , , , , , , , , , , , , ,

How to Make a Popcorn Bracelet

I have a super fun and easy craft for you today.  I’m going to show you how to make a Popcorn Bracelet.  This just might be the only jewelry you can make that while you make it you can eat it as well.  Just keep it mind that once you have painted the popcorn you CAN NOT eat it.  But, until the popcorn has been painted it is a tasty treat.  So, grab your friends, a good movie to watch and some popcorn and let’s make this fun craft.

Check out our other Jewelry Crafts.

Tutorial offered by Laura from Dacian Moon Handmade


Materials Needed

– popcorn
– thread and needle
– paints
– paintbrush


Step 1

Paint the popcorn in your favorite colors.


Step 2

Let them dry.


Step 3

Make a knot on one side of the thread, leaving enough extra thread to tie the bracelet.


Step 4

Start placing the popcorn on the thread, using the needle.


It will look like that.


Step 5

After the last popcorn is on the thread, make another knot near it…. and cut the thread (letting again enough extra thread to tie the bracelet).


Now, you have a cute bracelet.


Isn’t that adorable?  And, it was so much fun to make, wasn’t it?    How did your Popcorn Bracelet turn out?  Let me know in the comments below.  And, take a picture of the Popcorn Bracelet and add that to the comment as well… I’d love to see it.

Technorati Tags: , , , , , , , , , , , , ,

How to Make a Valentines Critter

I have a fun craft for you today.  I’m going to show you how to make a Valentines Critter.  This Valentines Critter is perfect to give your someone special as a gift this Valentines Day.  The critter holds on to the sweetest lollipops that any receiver will be sure to love.  Add a sweet and loving note and you have the perfect gift ready for giving to your someone special.  So, grab the materials needed and let’s get started.

Check out our other Valentines Day Crafts.

Laura from Dacian Moon Handmade  will show you how to make this critter, step by step.


Materials Needed

– cardboard (a rectangle of 7 cm x 5 cm)
– red paper
– scissors
– pen
– pencil
– 2 flexible straws
– lollipop
– card punch


Step 1

Draw two hearts on the red paper…


… and cut them out.


Using your pen draw eyes, nose, mouth on one of them and write “Happy Valentines Day” on the other one.


Step 2

Take the cardboard…


And make 4 holes in it, like this (using the card punch).


Apply a layer of glue on the lower part of the heart with eyes…


… like this…


… and place it over the cardboard, like this.


Step 3

Take a straw…


… measure the distance between two holes, like this…


… and bend it…


… to go through both holes.


It will look like that. Now the critter has one arm and one leg.


Bend the leg down…


… then bend it again at 2 cm of the straw end to make the foot.


Repeat this step to make the second arm and leg.


Step 4

Move the hands outward…


… and bend one from the middle inward (from the elbow)


This arm will support the lollipop.


Step 5

Using the scissors make a small cut on the other arm.


Put the second heart on this cut and the critter is ready.


Imagine the surprise of the receiver of this Valentines Day Gift…. they are sure to love it.  How did your Valentines Critter turn out?  Let me know in the comments below.  And, take a picture of your critter as well… you can share that too in the comments.  I’d love to see it.

Technorati Tags: , , , , , , , , , , , ,

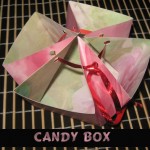
How to Make a Candy Box for Valentines Day

Are you planning on giving your special someone something special for Valentines Day?  Is that something special some candy?  Well, instead of just giving your someone special an ordinary heart shaped box filled with candy…. why not give that person a handmade Candy Box this Valentines Day?  Imagine their surprise when they see that you gave them something you made yourself.  The craft is an easy one, but turns out really beautiful.  So, grab the materials needed and let’s get started.
Check out our other Valentines Day Crafts.

Laura from Dacian Moon Handmade  will show you this Candy Box tutorial step-by-step.


Materials Needed

– pattern cardboard (ideally with different pattern on the sides)
– assorted ribbon
– scissors
– card punch
– pencil


Step 1

Cut a square from the cardboard.


Divide your card into thirds.


Rotate the card 90 degrees and divide the card into thirds again. You now have 9 squares scored on your card.


Step 2

On each of the four corner squares, score a line diagonally, from the corner of the square in toward the center.


Fold along the horizontal lines …


… then along the vertical ones…


… and eventually along the diagonal lines.


It will look like this.


Punch a hole in each of the four corner squares…


… like this.


Take a piece of ribbon …


… and thread it through the punched holes.


Draw the ends of the ribbon together and tie a knot, or a bow if you like. Now fill it with candy.


And, that’s it!!  Easy Peasy Lemon Squeezy!!  You just finished your Candy Box for Valentines Day.  How did it turn out?  Now, fill with candy and give it to your favorite someone this Valentines Day.

Technorati Tags: , , , , , , , , , ,

How to Make a Lollipop Holder Gift for Valentine’s Day

Today I have a fun craft for you.  I’m going to show you how to make a Lollipop Holder Gift for Valentine’s Day.  It is a perfect gift for a friend, family or even a secret admirer.  Make several of these Lollipop Holder Gifts and give them to many people.  Whatever you would like to do.  The receiver is sure to love this gift.  So, grab the materials needed and let’s get started.

Check out our other Valentines Day Crafts.

Laura from Dacian Moon Handmade will show you this craft step-by-step.


Materials Needed

– colored paper (not too thin) – measure two and a half lollipop size (without the stick)
– white paper
– scissors
– paints
– paintbrush
– glue
– pencil
– lollipop


Step 1

Take the colored paper…


… and fold it leaving 2 cm on top.


Step 2

In the middle of the folded edge cut a triangle…


… like that:


Step 3

Fold the paper on one top of the cutted triangle…


… then on the other one.


Step 4

Bring the white paper on the short side of the colored paper and measure how big you want it to be.


Then cut it on the markings.


Step 5

Let’s decorate the white paper. With the pencil…  draw the middle of a flower, one petal…


… and many broken petals on the ground.


Step 6

With black paint and a toothpick paint the contour of your drawing.


It will look like this.


Step 7

Paint the petals as you wish.


Make the stem green and the middle orange.


Step 8

With black write on every petal “He loves me” or “He loves me not”, taking care that on the petal that is  still on the flower says, “He loves me”.


Like this:


Step 9

With red write,  “Happy Valentine’s Day”.  Let it dry.


Step 10

On the back side of the painted paper…apply a layer of glue…


… And place it on the colored paper, where you had measured.


Step 11

On the middle of the upper part make markings at 3 cm.


Starting on the markings make a circular cutting on the back part of the paper. Like this:


Step 12

Place the lollipop in the hole from the base …


… and close the box.


And there you have it…. you just made a Lollipop Holder Gift for Valentine’s Day.  Isn’t it just precious?  Imagine the surprise of the receiver when you tell them you made it from scratch…. they will love it!!

Technorati Tags: , , , , , , , , , ,

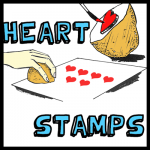
How to Make a Potato Heart Stamp

I have a very unique craft for you today.  I’m going to show you how to make a Potato Heart Stamp for Valentine’s Day.  Yep, you read that right…. a stamp made from a potato.  It is such a clever idea, isn’t it?  And yet…. so simple.  You can make Valentines pictures and Valentines Cards with your Potato Stamp.  You will need a little help from an adult for this craft as it does call for a sharp knife.  An adult will use the knife to cut the top of the potato off.  So, make sure not to start this craft without an adult present.  So, with that being said grab an adult and the materials needed and let’s get started.
Check out our other Valentines Day Crafts.


How to Make a Potato Heart Stamp


Materials Needed

Potato

Sharp Knife (for an adult)

Butter Knife

Toothpick

Red Paint

Paintbrush

Paper


Step 1


Get a potato.


Get a potato.


Step 2


Ask an adult to cut the end off of potato.


Ask an adult to cut the end off of potato.


Step 3


Cut heart into the potato


Cut heart into the potato with butter knife and a toothpick.


Step 4


Brush paint onto the raised heart.


Brush paint onto the raised heart.


Step 5


Now push the heart against the paper


Now push the heart against the paper… repaint the potato between each print to get the best printed hearts.

Isn’t that a unique way to make hearts on a piece of paper?  I think it is…. plus it is a ton of fun.  Now, why don’t you use your Potato Heart Stamps to make some great Valentines pictures or cards to hand out to your friends and family.  I am sure they will absolutely love them!!

Here is our video on How to Make a Potato Heart Stamp.

Technorati Tags: , , , , , , , , , , ,

How to Make a Chocolate Bar Box for Valentine’s Day

Valentine’s Day is right around the corner.  It is on February 14th and it will be here before you know it.  Are you prepared yet?  Do you know what you are getting your friends and family for Valentine’s Day?  Or perhaps you have a special person you have been admiring from “a far”.  Either way I have the craft for you today.  In this post I’m going to show you how to make a Chocolate Bar Box for Valentine’s Day.   You are simply going to start off with your receiver’s favorite candy bar and go from there to construct the perfect chocolate bar box for this special occasion.  So, grab the materials needed and let’s get started.

Check out our other Valentine’s Day Crafts.

Laura from DacianMoon Handmade will show you how to make this chocolate box.


Materials Needed

– colored paper (not too thin)
– glitter glue
– scissors
– ribbon (about 40 cm)
– paint marker
– glue
– pencil
– chocolate bar


Step 1

Measure enough space for the chocolate (let’s say 2.5 cm on every side of the chocolate bar) and mark with a line.


Step 2

Fold on this line…


… and once again…


… like this:


Step 3

Cut the last part at 2 cm from the edge.


Step 4

On one of the small sides make a criss-cross cut.


Step 5

Unfold the paper.


Step 6

Apply a layer of glue on the back side of the chocolate bar…


… and place it in the middle.


Step 7

Apply a layer of glue on the ribbon too…


… as long as the width of the paper… then place the paper with the chocolate on top.


Step 8

Take the remaining paper…


… fold it in half…


… and draw a half of a heart on it.


Cut the drawing out.


Unfold.


Step 9

With the marker write in the middle of the heart “Happy Valentine’s Day”.


Step 10

Close the box and tie the ribbon making a knot on one side.


Step 11

Apply a layer of glue on the upper part of the back side of the heart, as I show in this picture.


Then place it on the box. Take care that the glued part does not touch the ribbon.


Step 12

Use glitter glue to decorate the heart.


Here is your elegant chocolate box…. ready to be given away to someone special.


Isn’t this chocolate box just fabulous to give out as a gift?  It really is.  Imagine how excited the receiver would be to receive it.  Now, the real question is….who are you going to give this awesome Chocolate Bar Box to for Valentine’s Day?

Technorati Tags: , , , , , , , , , , , ,

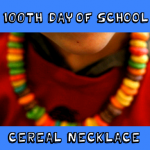
How to Make a Fruit Loop Necklace for the 100th Day of School

Depending on when your school district started school the 100th Day of School will be coming up quickly.  Now, is the time to start planning what kind of crafts you are going to do to celebrate the 100th Day of School.  I’m going to show you an easy, and tasty, craft for you to do…  Today I’m going to show you how to make a Fruit Loop Necklace perfect for the 100th Day of School.   Each child will get 100 of these colorful circles of cereal and they will string them to make a necklace.  The kids will love making it almost as much as they will love eating it.  So, let’s get started.

Check out our other 100th Day of School Crafts.


How to Make a Fruit Loop Necklace for the 100th Day of School


Materials Needed

Fruit Loops (100 for each child)

String or Yarn


Step 1


Get enough fruit loops for all the children


Get enough fruit loops for all the children making necklaces.


Step 2


String 100 Fruit Loops on a String.


Cut a piece of string or yarn large enough for a necklace and then string 100 fruit loops on it.


Finished Fruit Loop Necklace


The Fruit Loop Necklaces are now finished and are ready to be tied on each child so they can wear them proudly.  Don’t they look colorfully beautiful….. almost as good as they are going to taste.  YUM!!

Technorati Tags: , , , , , , , , , ,

Chinese New Year Crafts – Year of the Dragon


Chinese New Years Crafts


Chinese New Year falls on January 23rd this Year.  And, in honor of Chinese New Year I put together a list of crafts just about the Chinese New Year.  You will find that most of them are Dragon Crafts and you might wonder why….. well, I will tell you why.  This year is the Year of the Dragon.  So, to honor that fact the majority of the crafts I have listed here will be Dragon Crafts.  Not all of them…. there are plenty of fun other crafts that have nothing to do with Dragons.  So, check out the post and pick a few Chinese New Year Crafts to do with the kids….. they are sure to love them.  So, let’s get started.

Here are Even More Chinese New Years Crafts

Chinese New Year Crafts – Year of the Dragon

(1) Festive Ribbon Dragon


Festive Ribbon Dragon


Here is an adorable dragon perfect for this years Chinese New Years.  This is the mini sized version of the huge size dragon they use in parades for Chinese New Years.  Check out FamilyFun for all the crafting details.


(2) Pop-Up Greeting Card


Pop-Up Greeting Card


Isn’t this Chinese Pop-Up Greeting card gorgeous?  I think it is really beautiful.  Imagine giving this to someone to celebrate the Chinese New Year.  Go to FreePaperCraftTemplate for all the details on how to print off this free template.


(3) Origami Dragon


Origami Dragon


Since this Chinese New Year is the year of the Dragon how could I not include an Origami Dragon in this post.  And, look how awesome this Origami Dragon turns out.  You can get the full instructions for this Origami by going to Origami-Instructions.


(4) Chinese New Year Fish


Chinese New Year Fish


Fish is a very popular dish on Chinese New year.  Fish is a sign of prosperity…. so it is very common to see people eating fish on Chinese New Year.  With that being said I thought it was a good idea to include Fish in this Chinese New Year Post.  Go to Julie K in Taiwan for all the craft details.


(5) Chinese Dragon Door Hanger


Chinese Dragon Door Hanger


Here is a cute craft for the youngest of crafters.  If you go to NickJr they show you how to make a simple Chinese Dragon Door Hanger that is perfect for any kid’s room.  Plus, making this craft with them is the perfect time to explain to your kids a little bit about the Chinese New Year.


(6) Dragon Mask


Dragon Mask


Now, isn’t this Dragon Mask incredible?  What little one wouldn’t love wearing this Dragon Mask all over the house.  After all, children love dressing up.  Find all the Dragon Mask “how-to’s” over at AlphaMom.  This is such a great Chinese New Year craft!!


(7) Pull-A-Long Dragon Craft


Pull-A-Long Dragon Craft


Here is a great way to make a Dragon for Chinese New Year….. made out of paper cups.  How awesome is that?!  It turns out so cute too.  This is a great way to teach your children about the Chinese culture.  Make sure to check out the craft in its entirety over at FreeKidsCrafts.


(8) Toy Spinning Hand Drum


Toy Spinning Hand Drum


Here is a fun toy for the Chinese New Year.  Not only fun to play with…. but also fun to make.  This toy is a great way to make lots of noise during the Chinese New Year.  Make sure to check out 4CrazyKings for all the fun details.


(9) Paper Dragon


Paper Dragon


This is a fun craft for the Chinese New Year.  This Paper Dragon turns out so beautiful…. I just love the colors.  I found this craft over at CraftJr and I just love it.  She explains how this craft is really so easy that a toddler can do it.  And, trust me…. the kids will love maneuvering around the dragon with the sticks.


(10) Marbled Red Vinasse Eggs


Marbled Red Vinasse Eggs


This Marbled Egg  is an extremely popular Chinese snack…. and it is extremely popular during Chinese New Year as the egg represents fertility.  To get this marbled effect you first crack the egg and then simmer the egg in colored liquid.  Get the full details at Pig Pigs Corner.


(11) Paper Chain Dragons


Paper Chain Dragons


One of the easiest crafts to teach a young child is how to make a paper chain.  So, let’s use that technique to make a Paper Dragon.  The kids will have such a fun time making this craft.  The Chinese tradition is a rich tradition….. why not show this to your kids by creating this craft.  Check out NaturallyEducational for all the craft details.


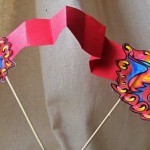
(12) Flying Dragon Puppet


Flying Dragon Puppet


Okay, I officially love this craft…. I just love how it turns out.  It turns out so colorful and festive…. just like any New year should be.  Check out JellyFishJelly for the craft details and put this Flying Dragon Puppet together.  I don’t know what your kids will love more…. putting the craft together or playing with the puppet.

Technorati Tags: , , , , , , , , ,

11 Cool Outer Space Crafts for Kids


11 Cool Outer Space Crafts for Kids


Today I have some awesome craft ideas for you.  Not just any craft ideas…… today I have cool outer space crafts for you.  I was making my way through the internet looking for some really creative outer space crafts and I think I found them.  I found some that are made from food and others that are made from recycled materials.  I found crafts that are perfect for the youngest of crafters and others that are meant for older children.  But, bottom line…. there is an outer space craft here for you.  So, enough with the chit-chat….. let’s get started.

11 Cool Outer Space Crafts for Kids

(1)  Orbiting Planets


Orbiting Planets


Here is a great craft to help teach your kids about space and all the orbiting planets.  Plus, the craft is a lot of fun.  I found this craft over at BusyBeeKidsCrafts and they have the right idea….. use a fun craft to help teach your children about space.


(2) Recycled Robot Craft

Recycled Robot Craft

Look how cute this robot is….. so cute!!  And, it is made from many recycled materials which makes this robot even cooler.  FreeKidsCrafts shows you how you can take tin foil, an empty container and soda bottle lids and make it into a robot like above.  How fun!!


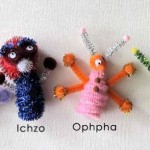
(3) Alien Pipe Cleaner Craft


Alien Pipe Cleaner Craft


I love this craft…. I just love how these little aliens turn out.  I found this Outer Space craft over at Craft Jr. She shows you step-by-step how to make the aliens as pictured above.  But, she also explains how if you have mismatched colors or pipe cleaners of different sizes it doesn’t matter…. they are aliens after all.


(4) Spiral Galaxy


Spiral Galaxy


What a pretty craft….. I love all the colors in this Spiral Galaxy Craft.  And, believe it or not this Outer Space craft is made with a paper plate and some glow in the dark paint.  TheCraftyClassroom shows you in detail how you too can make this craft.


(5) Out of this World Centerpiece


Out of this World Centerpiece


Here is a cool craft that will be a lot of fun to put together.  Plus, this Out of this World Centerpiece is perfect if you are having an Outer Space birthday party.  Imagine this being the centerpiece at the Birthday table.  Find out how to make this over at MakingFriends.


(6) Grass Head Monster


Grass Head Monster


This is an awesome Outer Space craft because your child is going to have to care for it everyday.  It is actually made with real grass seed so your child will have to care for it everyday for the grass to grow.  Check out FreeKidsCrafts for all the details.


(7) Googly Eyed Green Blobs


Googly Eyed Green Blobs


These are pretty creepy looking…. aren’t they?  I found this craft over at MakeAndTakes and she had it posted as a Halloween craft, but I thought this craft would also fit for an Alien…. so I am including it in this Outer Space crafts list.  Check out her site for all the “how-to” details.


(8)  Rocket Craft


Rocket Craft


Isn’t this Rocket craft just adorable?  I love it!!  And, it is made out of a cardboard box.  What a creative idea.  You will need help from an adult for this craft as they do use a craft knife.  But, it would be so much fun making this with your parents.  Check out Se7en for the step-by-step details.


(9) Space Cake


Space Cake


I just had to add this cake to this post.  I know it really isn’t a craft Per Se, but I think cooking can be quite crafty…. and it is also a ton of fun to do with an adult.  So, check out this Outer Space cake over at FamilyFun and get the recipe to cook with your parents.  This would be great for an Outer Space birthday party.


(10) Puffy Paint Moon Craft


Puffy Paint Moon Craft


AllKidsNetwork shows us how if you mix shaving cream and glue together it makes a lumpy and bumpy surface….. just like the moon.  Actually, what they explain is that while the glue dries it makes a smooth-textured material that puffs while it’s drying and then flattens out.  Isn’t that cool?  Go to AllKidsNetwork to check out the full details.


(11) Space Shuttle Craft


Space Shuttle Craft


Wow, isn’t this space shuttle amazing?!  It’s just so creative.  And, the best part…. It’s made out of mostly all recycled materials.  How cool is that?!  Kids of all ages will love making this space shuttle…. the younger kids will need help from an adult.  Check out LooLeDo for the entire craft tutorial.

Technorati Tags: , , , , , , , , , , ,

How to Make Egg Head Christmas People

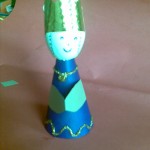
I have a fun craft for you today.  I’m going to show you how to make Egg Head Christmas People out of eggshells.  You can even make an entire series of egg people…Use your creativity to make angels, shepherds, Mary and Joseph. These make great tabletop Christmas decorations…. so make a few.  Let’s get started.

Check out our other Christmas Crafts.


Image005


Craft materials required:

Thick purple paper

Thick brown colored paper (or any skin color shade)

Egg Shell

Glitter Glue

Gold Paper

Permanent Marker

Glue

Scissors


Image006


Step 1

Take a square piece of purple paper.


Image105


Step 2

Roll it to make a cone and glue the end to hold it in place. Cut the edge to form a perfect cone that will stand as shown.


Image106


Step 3

Wash and dry an egg which has been broken from one end and emptied as shown.


Image100


Step 4

Cut a strip of gold paper and snip the edges to make a zigzag design as shown.


Image104


Step 5

Roll the strip and glue. Glue the crown to the top of the head as shown.


Image107


Step 6

Take a small strip of brown card paper and fold in the center as shown.


Image001


Step 7

Glue the ends of the paper strip to the cone as shown to form folded hands.


Image002


Step 8

Draw a face using a permanent marker.


Image003


Step 9

Decorate the clothes with glitter glue as shown


Image005


Isn’t it beautiful?  Who would have thought that this could have been started from an eggshell.  But, of course it was.  Please let me know in the comments below how your Egg Head Christmas People turned out.  And, don’t forget to share a picture in your comment…. I’d love to see them.

Technorati Tags: , , , , , , , , , ,

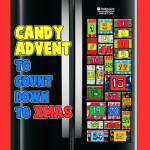
How to Make a Candy Advent Calendar to Count Down to Christmas

I have a great way to use up that Halloween Candy that you still have stashed away…. use them to make a Christmas Advent Calendar.  That’s right…. I’m going to show you how to make a Candy Advent Calendar to Count Down to Christmas.  This is a great way to get the kids excited about Christmas…. as if they weren’t excited already.  This Advent Calendar is a magnet craft…. perfect for displaying on your fridge.  So, let’s get started.

Check out our other Christmas Crafts.


How to Make a Candy Advent Calendar to Count Down to Christmas


Materials Needed

25 Mini Boxes of Candy or Candy Miniatures

Wrapping Paper

25 Magnets

Colorful Pieces of Paper

Glue

Tape

Scissors


Step 1


Collect mini boxes of candy / or miniature chocolates


Collect mini boxes of candy / or miniature chocolates from your Halloween candy stash.  You will need 25 of them.


Step 2


Place candy in center of wrapping paper


Place candy in center of wrapping paper (back).  The color side is down.


Step 3


Fold both sides in towards the center.


Fold both sides in towards the center.


Step 4


Tape sides together.


Tape sides together.


Step 5


Fold the 4 corners inwards.


Fold the 4 corners inwards.


Step 6


Fold inwards to form 2 triangles in X shape.


Fold inwards to form 2 triangles in X shape.


Step 7


Tape shut.


Tape shut.


Step 8


You finished wrapping the box.


Now, turn the box around… you wrapped it.


Step 9


Glue magnets to the back of wrapped candy.


Glue magnets to the back of wrapped candy.


Step 10


Print out or write numbers on colorful pieces of paper or on wrapping paper.


Print out or write numbers on colorful pieces of paper or on wrapping paper.  Glue or tape on front of candy.


Step 11


Then mount the wrapped candy on your fridge.


Then mount the wrapped candy on your fridge.  Each day, eat the candy.  When no candy is left, then you know that it is Christmas.


How to Make a Candy Advent Calendar to Count Down to Christmas


You have just finished your Candy Advent Calendar.  Now, you are all set to count down to Christmas.  How did your Advent Calendar turn out?  Let me know in the comments below.  You can also take a picture of your fridge and post it in the comments too…. that way I can see how it turned out.

Technorati Tags: , , , , , , , , , , , , , ,