Giving Thanks Thanksgiving Crafts Roundup


Giving Thanks Thanksgiving Crafts Roundup


Thanksgiving is coming up quickly.  This month wouldn’t it be a great idea to fill it with crafts that remind us what this Holiday is all about….. being thankful.  We all have so much to be thankful for.  So, in this link roundup I have scoured the internet to find crafts that all have to do with being thankful.  Each craft is a lot of fun and all can be used as a Thanksgiving decoration…. but most of all they remind us to be thankful.  With these crafts you will be doing them as a family…. and family is one of the most important reasons to be thankful.  So, get ready to spend some time looking at some amazing Thanksgiving “Giving Thanks” Crafts….. you are sure to find one that you will love.
Check out our other Thanksgiving Crafts.

Giving Thanks Thanksgiving Crafts Roundup

(1)  Thanksgiving Countdown Calendar


Thanksgiving Countdown Calendar


This Thanksgiving craft is kind of like a Holiday Advent Calendar.  You and your family can express your thanks and gratitude simply by writing your thanks on your color piece of paper and adding it to the envelopes.  Look at them each day to remind each other what you are Thankful for.  I found this great Thanksgiving craft at Parents.com.


(2)  Give Thanks Napkin Rings


Give Thanks Napkin Rings


In this Thanksgiving thankful craft Jeanne Winters shows you how to create these amazing napkin rings that inspire your Thanksgiving guests to go around the Thanksgiving table before the feast and let everyone know what they are thankful for.


(3)  Give Thanks Yarn Turkey


Give Thanks Yarn Turkey


This Thanksgiving thankful craft was one of our crafts posted last Thanksgiving Season.  It’s a craft that your children will love putting together.  Plus, it is part finished when it is presented at the Thanksgiving table and finished by the guests adding to each feather what they are thankful for.  Check it out.


(4)  Gratitude Tree Advent Calendar


Gratitude Tree Advent Calendar


Here is another advent calendar idea using this time a tree.  Trees are great for this Thanksgiving craft because they have many branches to add your thankful ideas to…. plus trees are perfect for this fall craft.  Oopsey Daisy came up with this Thanksgiving craft and I love it.  Check it out to see how she uses a magnetic sheet and bottle caps for this craft.


(5)  Give Thanks Board


Give Thanks Board


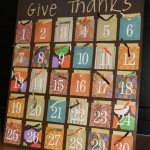
This Thanksgiving thankful craft is similar to the first one, but instead of it being a garland it is actually all out on a board.  What is really cool about this Thanksgiving thankful craft is the use of  a variety of coordinating scrapbook paper giving it an amazing look.  Check it out for yourself at JellybeanJunkyard.


(6)  Thankful Bucket


Thanksgiving Thankful Bucket


Here one family shows you how they use a Thankful Bucket to remind each other what they are thankful for this Thanksgiving season.  Here The Idea Room shows us how to put together this festive bucket.  Have the family fill it with things they are thankful for…. after dinner share these things with the rest of the family.  Great idea.


(7)  Changeable Frames for Thankfulness


Changeable Frames for Thankfulness


Here is a clever idea by Flamingo Toes.  Here the writer of this post shows you how to make a place that your family can write down what they are thankful for.  This particular Thanksgiving thankful craft is made with glass over the embroidery so they can write different things all month long.  They can wipe it clean and start over as often as they would like.


(8)  Thankful Leaf Garland Decoration


Thankful Leaf Garland Decoration


Here is a cute Thanksgiving thankful craft.  And, one that looks awesome as a Thanksgiving decoration.  Full Circle shows you how to make this festive craft.  Simply string together construction paper leaves and have family members write on the leaves what they are thankful for.  String together as garland for all to see.


(9)  Thankful Tree


Thanksgiving Thankful Tree


Here is a great Thanksgiving thankful craft that is perfect for even the youngest of crafters with just a lit bit of help from you.  Playful Learning shows you how to make one of these Thankful Trees for your houses.  Simply have the kids make leaves, color them and cut them out.  Have the children write down what they are thankful for.  She will show you how to finish it off with a tree branch.  Check it out for yourself.


(10)  Thanksgiving Hat


Thanksgiving Hat


Here is a fun Thanksgiving thankful craft that the little kiddies will love.  Dim Sum, Bagels and Crawfish shows you how to make this craft.  The kids will love making it, but even more so love wearing it.  If you are having a Thanksgiving dinner at your house considering doing this craft with the little ones at your feast…. they will love it.


(11)  Paper Cornucopia of Thanks


Paper Cornucopia of Thanks


Flip Flops and Applesauce shows you how to take some paper and posicle sticks and make it into a beautiful and meaningful table centerpiece for Thanksgiving.  Make sure to involve the whole table…. have your guests each write down what they are thankful for and read them out loud.


(12)  Thanksgiving Clothespin Wreath


Thanksgiving Clothespin Wreath


Here is a cool Thanksgiving thankful craft that also works as an awesome Thanksgiving wreath decoration for the Holidays.  I found this Thanksgiving craft over at Chica and Jo.  This amazing Thanksgiving wreath is made from Clothespins.  Add a sharpie to your wreath and let your visitors add what they are thankful for.  Save it for years to come.

Technorati Tags: , , , , , , , , , , , , ,

How to Make Paper Log Cabins for Thanksgiving

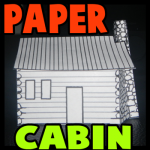
Whether you want to teach your children about the Pilgrims or whether you are just looking for some Thanksgiving decorations to put around the house…. I have a great Thanksgiving craft for you.  Today I’m going to show you how to make Paper Log Cabins for Thanksgiving.  This would be a great craft to help teach your children about Thanksgiving and how important the Pilgrims were to that…. plus, the craft is a lot of fun.  Use the finished Log Cabin to put around the house as a Thanksgiving decoration.  Let’s get started.

Check out our other Thanksgiving Crafts.


How to Make Paper Log Cabins for Thanksgiving


Materials Needed

Printer & Paper

Scissors

Ruler

Butter Knife

Glue


Click on template image below to open up new page and to print.


Log Cabin Template


Step 1


Print out the cabin template.


Print out the cabin template.


Step 2


Cut out both parts.


Cut out both parts.


Step 3


Score on lines by using a ruler and dull side of butter knife.  Then fold.


Score on lines by using a ruler and dull side of butter knife.  Then fold.


Step 4


Glue together with side tab.


Glue together with side tab.


Step 5


The chimney folds into a 3D rectangle.


The chimney folds into a 3D rectangle.


Step 6


Paste chimney on top tabs.


Paste chimney on top tabs.


Step 7


Let dry.


Let dry.

There you go…. you just finished making one of your Paper Log Cabins for Thanksgiving.  Make a few and use them for a Pilgrim Lesson for your kids and as Thanksgiving decorations for around your house.

Technorati Tags: , , , , , , , , , , , , ,

How to Make Leaf Place Cards for Thanksgiving

Thanksgiving is coming up pretty quickly.  I mean, it is just a few weeks away.  Now is the time to start working on your preparations for the Thanksgiving Holiday.  Today I will show you how to make Leaf Place Cards for Thanksgiving.  These Place Cards are a simple, but elegant.  Your Thanksgiving guests will love these lovely Thanksgiving Place Cards…. so much so that they will probably take their place card home to remember your beautiful Thanksgiving dinner.  Let’s get started.

Check out our other Thanksgiving Crafts.

Laura from  Dacian Moon Handmade will show you how to make these Thanksgiving place cards.


Materials Needed

– cardboard
– red paper
– glue
– scissors
– gold paint
– pencil
– cotton swab


Step 1

Cut a square from the cardboard (with the side about 8 cm).


Fold it in half.


Step 2

Using the pencil …


… draw a leaf on the red paper…


then cut it out.


Step 3

Now we will decorate the leaf to look more real.


Trace a line of gold paint on the middle of it…


… and spread it with the cotton swab…


… like this.  Now, the leaf has the golden tone of an autumn leaf.


Next, we will trace the veins – start with the main one, in the middle…


… then the little ones, on both sides of it…


… like this.


Step 4

With the paint that is still on the swab, make some short, uneven lines on the edges of the folded cardboard…


… like this.


Step 5

Apply a small amount of glue on the right upper part…


… then place the leaf there.


The place card is now ready to decorate your Thanksgiving table.  Make one for each of your guests this Thanksgiving.  It will give your dinner a formal touch.

Technorati Tags: , , , , , , , , , , , , , ,

Haunted House Crafts Perfect for Halloween


Haunted House Crafts Perfect for Halloween


Halloween is coming up quickly.  After all, it is at the end of this month.  When you think of Halloween what do you think of?  Probably bats, jack-o-lanterns and witches.  But, don’t forget the place they all live.  That’s right…. I’m talking about a Haunted House.  There is not much scarier than a Haunted House.  So, with that being said I am dedicating today’s craft to Haunted Houses.  I scoured the internet looking for an assortment of different kinds of Haunted House crafts perfect for Halloween.  With all 17 of these Haunted House crafts I have listed here you are sure to find one you will love.  So, without further ado….

Haunted House Crafts Perfect for Halloween

(1)   Haunted House Centerpiece


Haunted House Centerpiece


If you are throwing a Halloween party and you are looking for something to have as a centerpiece…. then I have the perfect craft for you.  Busy Bee Kids Crafts shows you how to make this spooky Haunted House Centerpiece step-by-step.


(2)  Paper Bag Haunted House


Paper Bag Haunted House


This Paper Bag Haunted House is perfect for decorating your house for Halloween, but it is also wonderful to use as party favors for a Halloween party.  You can fill these bags with goodies for the kids…. they will love it.  I found this craft over at Kaboose and it looks like a ton of fun.


(3) Haunted House Milk Carton (You can Fill This One with Treats)


Haunted House Milk Carton for Treats


This one is on our site and is made from a simple milk carton or creamer carton. All you have to do is fill with treats or candy, tape closed, wrap with paper, and decorate. Here are the craft instructions.

(4)   Popsicle Stick Haunted House


Popsicle Stick Haunted House


Here is a great Haunted House craft perfect for the youngest of children.  All Kids Network shows you how to make this Halloween craft and it is almost totally made up of Popsicle sticks.  And, we all know how much kids love making things with Popsicle sticks…. almost as much as they love eating the Popsicles.


(5)   Haunted Gingerbread House


Haunted Gingerbread House


Now, tell me how awesome this Haunted House is!!  It is just incredible…. and it is totally edible.  Gotta love that!!  I found this Haunted House craft over at Sisteroo and I hope you love it as much as I do.  This Gingerbread Haunted House makes for a perfect decoration or an edible treat for a Halloween party.

(6) Haunted House Pop Up Cards


Haunted House Pop Up Cards


Here is another Haunted House craft this from this site. Everyone loves pop up cards and this is one of the simplest types that you can make. We will teach you how to make these with just a few slits and a bit of folding. Find out the instructions here.


(7)  Cardboard Box Haunted House


Cardboard Box Haunted House


How cute is this Haunted House?  So cute!!  And, it is made out of an item you probably have laying around the house…. a cardboard box.  I found this Halloween craft over at Spoonful and it is a great find.  Check out this craft and get all the haunted details.


(8)  Spooky S’mores Haunted House


Spooky S'mores Haunted House


YUMMY!!  Here is another edible Haunted House craft.  I love the edible crafts.    If you love S’mores then you are going to surely love this craft.  Check out Kitchen Fun with my 3 Sons for all the yummy spooky details.


(9)  Shoe Box Haunted House


Shoe Box Haunted House


I just love those crafts where you can find the materials needed right in your home.  And, this craft is one of them.  Scribble Press shows you step-by-step how to make this creepy Haunted House out of a shoe box….. very clever!!


(10)  Poster Board Haunted House


Poster Board Haunted House


I love this Haunted House craft!!  I think what I love so much is the fact that this Haunted House is very narrow and tall…. it gives it a very creepy vibe.  Perfect for a Halloween decoration.  I found this Haunted House craft over at Crissy’s Crafts.  You have to check it out for yourself.


(11)  Paper Mâche Haunted House


Paper Mache Haunted House


Kids love working with Paper Mâche…. and making this Paper Mâche Haunted House will be no exception.  And, this haunted house really turns out amazing.  Get all the Halloween craft details over at Woman’s Day.


(12)  Mod Podge Haunted House


Mod Podge Haunted House


How amazing is this Haunted House?  So amazing!!  Mod Podge is a material that kids love working with…. they just do.  I know my children do.  Here B-Inspired Mama shows you how you too can make this incredible Haunted House using Mod Podge.


(13)  Spooky Haunted House


Spooky Haunted House


 AllYou shows you how to take an old dollhouse and make it into this awesome Haunted House.  Your kids are sure to get a kick out of using their old dollhouse and making it into a Haunted House.  Check out the website for all the craft details.


(14)  Heebie Jeebie Haunted House


Heebie Jeebie Haunted House


I found this Haunted House craft over at Crayola.  This Halloween craft is perfect if you are having a Halloween party.  Make a bunch of these Haunted Houses and use them to store candy…. hand them out as a Halloween Party favor.  How fun is that?!


(15)  Cardboard Boxes & Rolls Haunted House


Cardboard Boxes & Rolls Haunted House


Isn’t this a rock’n Haunted House?!  Or, should I say…. Haunted Mansion?!  I love it.  Patheos used different sized cardboard boxes and cardboard rolls to make this Haunted House craft.  It is a clever idea and it came out amazing.  Check out her site to see it for yourself.


(16)  Cereal Box Haunted House


Cereal Box Haunted House


What a great Haunted House.  And, what it totally cool about this Halloween craft is that it is simply made from a cereal box.  I love when you can find your craft materials right at home…. and in this case you can.  Check out Fun Lab Blog for all the Haunted House Craft details.


(17)  Glow in the Dark Haunted House


Glow in the Dark Haunted House


You know what is spooky?  Something that glows in the dark….. like this Haunted House.  I’m not sure why, but an item that has a glowing effect is just 10 times spookier.  And, it’s perfect for Halloween.  Make sure to check out Craft Project Ideas for the step-by-step “how-to” on making this Glow in the Dark Haunted House.

Technorati Tags: , , , , , , , ,

How to Make a May Basket

I have a fun and easy craft for you today.  In this post I’m going to show you how to make a May Basket.  This craft is a great craft for even the youngest of crafters as we will be using a template for this craft.  Simply print out the template, cut, fold and glue and that’s it.  Of course, you are going to want your May Basket to be pretty so make sure to color and decorate it the way you see fit.  So, grab the materials needed for this craft and let’s get started.

Check out our other Spring Crafts.


How to Make a May Basket


Materials Needed

Printer & Paper

Scissors

Markers or Crayons

Paste


Click on the template images below to make larger and to print.

8×11 Size Paper

May Basket Template


Larger Paper

May Basket Template Large


Step 1


Print out template.


Print out template.


Step 2


Cut out the pattern on the black lines.


Cut out the pattern on the black lines.


Step 3


Decorate the basket.


Decorate the basket.


Step 4


Fold on the dotted lines.  Paste edges.


Fold on the dotted lines.  Paste edges.

You finished your May Basket….. great job!!  Now, fill your basket with something for Spring.  How about fill it with some beautiful flowers…. you can’t get more Spring than that.

Technorati Tags: , , , , , , , ,

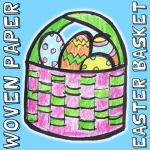
How to Make a Woven Paper Easter Basket

I have a fun Easter Craft for you today….. In this post I’m going to show you how to make a Woven Paper Easter Basket.  This Easter Basket is made out of sheets of construction paper and ribbon and when put together correctly it makes for an awesome Easter decoration.  You can fill it with plastic Easter Eggs or Paper Easter Eggs you made yourself and display it proudly in your house for all to see.  So, grab the materials needed and let’s get this craft started.

Check out our other Easter Crafts.


How to Make a Woven Paper Easter Basket


Materials Needed

3 Sheets of Construction Paper

Stapler

Scissors

Ribbon or Construction Paper


Step 1


Fold 2 pieces of paper lengthwise.


Fold 2 pieces of paper lengthwise.


Step 2


Staple together.


Staple together.


Step 3


Fold in half again.


Fold in half again.


Step 4


Cut slits about an inch apart.


Cut slits about an inch apart.


Step 5


Unfold.  Push ribbon or strips of paper thru slits... over, under, over, under.


Unfold.  Push ribbon or strips of paper thru slits… over, under, over, under.


Step 6


Staple ends together.


Staple ends together.


Step 7


make a handle by cutting a strip of ribbon or construction paper and stapling it to the basket.


You can make a handle by cutting a strip of ribbon or construction paper and stapling it to the basket.

Step 8

This is a great craft for Saint Patrick's Day. Have you ever heard of pixel art...well it is drawing with blocks (pixels)...this is how graphic images that you see on the screen are made. Anyways, it is sort of like mosaics with tiles because tiles are square blocks as well. Even if you don't understand what I'm trying to say, you can appreciate this craft for its coolness factor. This is an interesting form of paper weaving as you will see when you take a look at the steps. Happy St. Patrick's Day everyone.     <a href="http://www.artistshelpingchildren.org/kidscraftsactivitiesblog/wp-content/uploads/2013/03/400x400-pixelated-paper-woven-shamrocks.png"><img class="alignnone size-full wp-image-18362" alt="Pixelated Shamrock with Paper Weaving Craft for Saint Patricks Day" src="http://www.artistshelpingchildren.org/kidscraftsactivitiesblog/wp-content/uploads/2013/03/400x400-pixelated-paper-woven-shamrocks.png" width="400" height="400" /></a> <h2>Crafts Materials Needed:</h2> White Paper  Green Paper  Scissor  Tape <h2>Template to Print</h2> <a href="http://www.artistshelpingchildren.org/kidscraftsactivitiesblog/wp-content/uploads/2013/03/shamrock-pixelated-template.png"><img class="size-medium wp-image-18369" alt="Pixelated Shamrock Template" src="http://www.artistshelpingchildren.org/kidscraftsactivitiesblog/wp-content/uploads/2013/03/shamrock-pixelated-template-285x175.png" width="285" height="175" /></a> Click on Image and It Will Open Larger. Then Save Image to Your Computer. <h2>Step 1</h2> <img class="alignnone size-full wp-image-18363" alt="step1" src="http://www.artistshelpingchildren.org/kidscraftsactivitiesblog/wp-content/uploads/2013/03/step11.png" width="500" height="361" />  Firstly, cut strips of paper. You can cut them to any width, but I cut them each 1/2 inch wide. Cut about 15 of each color. <h2> Step 2</h2> <img class="alignnone size-full wp-image-18364" alt="step2" src="http://www.artistshelpingchildren.org/kidscraftsactivitiesblog/wp-content/uploads/2013/03/step2.png" width="550" height="432" />  Now lay strips of white paper down as seen above. Tape either the right or left side down. I taped it down on the right.  <script type=
<h2> Step 3</h2> <img class="alignnone size-full wp-image-18365" alt="step3a" src="http://www.artistshelpingchildren.org/kidscraftsactivitiesblog/wp-content/uploads/2013/03/step3a1.png" width="450" height="430" /> Then start weaving. You just look at the paper template provided and see how many green are needed on each line. In the pic above, 2 blocks are needed. (I taped too many white strips down and that is why the green starts 5 blocks away instead of 3 like in the template). <h2> Keep Going</h2> <img class="alignnone size-full wp-image-18366" alt="step3b" src="http://www.artistshelpingchildren.org/kidscraftsactivitiesblog/wp-content/uploads/2013/03/step3b1.png" width="350" height="433" /> Keep going. <h2> Until Completed</h2> <img class="alignnone size-full wp-image-18367" alt="step3c" src="http://www.artistshelpingchildren.org/kidscraftsactivitiesblog/wp-content/uploads/2013/03/step3c1.png" width="350" height="502" /> This is what the shamrock looks like when completed. <h2> Step 4</h2> <img class="alignnone size-full wp-image-18368" alt="step4" src="http://www.artistshelpingchildren.org/kidscraftsactivitiesblog/wp-content/uploads/2013/03/step41.png" width="350" height="461" /> I taped the white strips to the green strips on the bottom and top ( as seen in the picture ). Now that it is secured, you can turn it over and tape it in place on the back as well. You then have a really cool shamrock. I hope that this was fun for you.

Technorati Tags: , , , , , , , , , , , , , , , ,

 ” src=”http://www.artistshelpingchildren.org/kidscraftsactivitiesblog/wp-content/uploads/2012/03/inside-basket.png” width=”400″ height=”393″ />

Then take the 3rd sheet of construction paper and trace the circle of the basket onto the paper. Then make a 2nd line outside this first circle. Then cut slits from the outside circle to the inside circle. Then fold these slits inwards. Then tape these inward slits to the inside of the basket.

Finished Basket


Finished woven paper Easter basket


There you go…. you just finished making your Woven Paper Easter Basket.  Now, fill it with Easter Eggs and put it out as an Easter Decoration.  It sure to be a big hit!!

Technorati Tags: , , , , , , , , , , , , , , , ,

How to Make a Handkerchief Bunny Cup Cover

Today I’m going to show you how to make a Handkerchief Bunny Cup Cover.  If you don’t have a Handkerchief available…. you might have to ask one of your grandparents to borrow one for this craft.  You are going to be folding the handkerchief to create an Easter Bunny.  Once completed, this craft is perfect to use as an Easter decoration this Easter.  It would look great on any tabletop.  So, grab the materials needed and let’s get started.

Check out our other Easter Crafts.


How to Make a Handkerchief Bunny Cup Cover


Materials Needed

Handkerchief

Cup


Step 1


Fold hankie over.


Fold hankie over.


Step 2


It should look like this.


It should look like this.


Step 3


turn so fold is at bottom.


First, turn so fold is at bottom.  Then… Fold up bottom about 2 inches.  Turn over.


Step 4


Fold B & C over as seen.


Fold B & C over as seen.


It should look like this.


It should look like this.  Turn over.


Step 5


It should look like this.


It should look like this.


Step 6


Bend A down.


Bend A down.


Step 7


Now tie a bow around the neck ….and for a face, draw eyes and nose or cut out felt shapes for facial features. Then put it over a cup or glass.

There you have it…. you just finished your Handkerchief Bunny Cup Cover.  Now, use it to decorate your tabletop for Easter.  People will love it!!

Technorati Tags: , , , , , , , , , , , ,

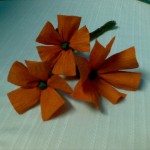
How to Make Crepe Paper Flowers

Crepe paper flowers are very beautiful, but usually require a lot of skill to make. But here’s a type of crepe paper flowers that are easy to make and look very pretty.   You don’t have to use the colors I did…. instead pick out a bunch of Spring colors to get in the Spring spirit.  After all, Spring will be here in just a couple of weeks.   These Crepe Paper Flowers are perfect for an upcoming party…. or better yet just decorate your child’s room with beautiful colors.  Either way…. let’s have fun making this craft.

Check out our other Crepe Paper Crafts.


Image093


Materials Needed


Crepe paper

Black color paper

Pipe cleaners- brown or green

Scissors

Ruler


Image091


Step 1

Cut out a piece of crepe paper about 15 inches  long and 10 inches wide. Make sure that the creases are from top to bottom along the width of the paper as shown.


Image082


Step 2

Fold the paper into half as shown.


Image079


Step 3

Cut out pieces of paper as shown (about 1 inch wide)


Image081


Image080


Step 4

Cut out a square of black paper, each side measuring about 1 inch. Place a small ball of paper inside it as shown.


Image084


Step 5

Use the paper to cover the ball and form a shape as shown.


Image085


Step 6

Arrange 5- 6  flower petals and black center like this. Hold it all together in your hand to arrange it. Make sure each petal is about 1.5 in long above the place you are holding it.


Image086


Step 7

Hold the bottom together and wind the pipe cleaner around it a few times as shown.


Image088


Step 8

Fold the pipe cleaner back to make a thick stem.

Fold each petal outwards.

Use your fingers to stretch the end of each petal, making it wider and curving it outward


Image092


Step 9

Make a bunch of flowers like this and use it to decorate your house this Spring.


Image093


And, there you have it….. you just completed making a bunch of crepe paper flowers.  Great job!!  Now, you are ready to decorate for a party this Spring…. or better yet just decorate the child’s bedroom with beautiful Spring color flowers…. it will be beautiful.

Technorati Tags: , , , , , , , , , , ,

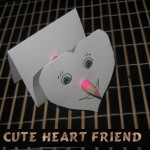
How to Make a Cute Heart Friend for Valentines Day

Valentines Day is in less than two weeks.  If you are still looking for Valentines Day decorations that are fun to make then I have a craft for you.  Today I’m going to show you how to make a Cute Heart Friend for Valentines Day.  This Cute Heart Friend will sit perfectly on top of a desk or table top.  If you would prefer…. this Cute Heart Friend can be given to your somebody special as a gift instead of a decoration.  Imagine the reaction of the receiver who gets this gift…. they will love it!!  So, let’s get started.

Check out our other Valentines Day Crafts.

Laura from Dacian Moon Handmade  will show you how to make this, step by step.


Materials Needed

– white paper (a rectangle of ~21 cm x 6.5 cm)
– scissors
– black and green pens
– pencil
– colored pencil (I used pink)
– card punch


Step 1

To begin determine the size for it.


Using this size, accordion fold the paper…


… like this.


Step 2

Using the card punch, make a hole in the middle, from side to side.


It will look like this.


Step 3

Draw a heart on the front side, as large as you can.


Cut the lower part out (take care to cut only from the front side)…


… like this.


Cut the upper part too.


Step 4

Draw eyes and mouth.


Using the colored pens, give it some color..


Put the pink pencil through the hole, with the pointy end in front.


Step 5

Spread the accordion folding, like this.


Now, this cute heart friend can stand on your desk.


Isn’t this Heart Friend a cutie patootie?!  Just perfectly sweet to use as a decoration for Valentines Day.  How did your Cute Heart Friend turn out?  Let me know in the comments below.  Don’t forget to take a picture and share that too in the comments…. I’d love to see it.

Technorati Tags: , , , , , , , , ,

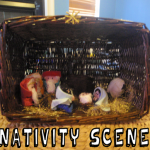
How to Make a Nativity Scene for Christmas

All week long I have been showing you how to make the characters for a Nativity Scene.  Well, today you are going to set up your Nativity Scene complete with basket.  You have been working hard and today you are going to get to see the results of all your hard work.  If you need to still complete the Nativity character crafts…. not a problem.  I have all the crafts for the Nativity characters below.  So, let’s complete the Nativity Scene for Christmas, shall we….

Check out our other Christmas Crafts.


How to Make a Nativity Scene for Christmas


How to Set up the Nativity Basket

Materials Needed

Basket – large enough to hold the nativity scene

Gold or Yellow Thread

4 Twist Ties

Glue


Step 1


Take 4 twist ties and wrap gold or yellow thread around them.


Take 4 twist ties and wrap gold or yellow thread around them.


Step 2


Fold over corners to keep thread on.


Fold over corners to keep thread on.


Step 3


Twist one of the twist ties over the other, like a letter V.


Twist one of the twist ties over the other, like a letter V.


Step 4


Fold one side down to now look like a cross.


Fold one side down to now look like a cross.


Step 5


Twist another one around the first two.


Twist another one around the first two.


Step 6


Do one more to look like this.


Do one more to look like this.


Step 7


Glue the star on top of basket.


Glue the star on top of basket.  Add gold or yellow thread to the bottom of the basket.

Now that you have the background to the Nativity Scene done it is time to make the characters that will fill this Nativity Scene.


Nativity Scene Character Crafts


Nativity Scene Characters


How to Weave the 3 Wise Men


How to Weave the 3 Wise Men for a Nativity Scene


How to Weave a Baby Jesus and Cradle


How to Weave a Baby Jesus and Cradle for a Nativity Scene


How to Weave Mary and Joseph


How to Weave Mary and Joseph for a Nativity Scene


How to Make Yarn Clothespin Sheep


How to Make Yarn Clothespin Sheep for a Nativity Scene


How to Make Yarn Clothespin Donkeys


How to Make Yarn Clothespin Donkeys for a Nativity Scene


And, there you have it…. you have all the crafts needed to complete your Nativity Scene.  I would love to see how your Nativity Scene turned out.  Please share your Nativity Scene with all of us by leaving a picture in the comments below.  I’d love to see how it turned out.

Technorati Tags: , , , , , , , , , , , , , ,

Ideas for Crafty & Creative Thanksgiving Kids’ Tables

Ideas for Crafty & Creative Thanksgiving Kids’ Tables

When I was a child I hated sitting at the Thanksgiving Kids’ Table.  I always felt I was missing what was going on at the adult’s table.  Well, I found some ideas around the internet that would change any child’s idea of the yucky kids’ table.  Any child would love to sit at any of these crafty and creative Kids’ Tables.  I am sure you can get some ideas from these for your own kid’s table.  Don’t forget to leave a comment and let me know if you tried any of these ideas or if you came up with your own.  Take a picture of your kids’ table and leave it in the comments so I can check it out.

Ideas for Crafty & Creative Thanksgiving Kids’ Tables

(1) TOTS TURKEY TABLE


Tots Turkey Table


Party Blueprints Blog went over and above for this Thanksgiving Kids’ Table.  I love everything about it… just like any child would.  Party Blueprints Blog explains how to do this yourself…. so make sure to check it out.


(2) Finger Puppet Favors


Finger puppet favors


Kid’s love finger puppets…. as I’m sure they will love this Thanksgiving Kids’ Table.  I can almost imagine the finger puppet shows the kids will be putting on while they are eating their Thanksgiving meal.  Martha Stewart shows you how you too can have this Kids’ Table.


(3) Color Little Hands


Color Little Hands


I found this brilliant idea over at NoFussFabulous and I had to show you.  She covers the table with butcher paper, so that the kids can use the crayons that are on the table to draw on the table.  She also gives each of the kids a tiny pumpkin to decorate.  But, my favorite idea is the centerpiece.  It’s a tree with hand prints of each of the kids and they write what they are thankful for on the leaves.  Keep the tree for years to come.


(4) Feathered Headdress Place Markers


Feathered headdress place markers


My son would love this Thanksgiving Kids’ Table.  He loves any kind of hat and he would surely adore these feathered headdresses…. any child would.  I found this idea over at HGTV and it’s a great one… make sure to check it out.


(5) Thanksgiving Ship


Thanksgiving ship


Check out this Thanksgiving Kids’ Table….. isn’t it beautifully colorful?!  I just love it.  And, look at all the kids have to do at this table.  Shindig Parties to Go shows you how to put this together too.  I love that she has activities for each child to do.  No bored kids here.


(6) I am Grateful For…. Table


I am Gratful For... Table


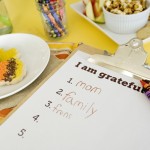
It is a great idea to remind children what Thanksgiving is all about…. what Thanksgiving represents.  Betty Crocker shows you how to do this with a little worksheet for the children.  She has you put it at each of the children’s spots so that they can list what they are thankful for.


(7) Markers and Stickers Thanksgiving


Markers and Stickers Thanksgiving


Happy Home Fairy knows what kids love….. Markers and Stickers.  She makes sure to have lots of markers and stickers at the kids’ Thanksgiving table.  She covers the entire table in butcher paper and let the kids do whatever they wish.  Kids will love this idea!!


(8) Special Place for Kids


Special Place for Kids


What a beautiful little Thanksgiving table…. perfect for children.  Southern Living shows you how to replicate this table.  She tells you to Write a “to-do” list next to each spot, so that children can check them off as they do all the Thanksgiving activities.  This way there is no way they will forget to do all the Thanksgiving activities.


(9) Printable Thanksgiving Kids’ Table


Printable Thanksgiving Kids' Table


I found this idea over at Lily’s Laundry.  She makes sure there are plenty of markers, beads, string and glue at the table so that the kids can start creating once they have sat down at the table.  You can print off the colorful decorations for free at Lily’s Laundry, so make sure to check it out.


(10) Pilgrim Kids’ Table


Pilgrim Kids' table


Here’s a cute Thanksgiving Kids’ Table…. I love the turkey leg.  Each pie is filled with treats for each of the kids.  I found this idea over at Fiskars.  She made this Thanksgiving Kids’ Table to occupy the kids while everyone was working in the kitchen or watching football.  The table keeps the children entertained.

Technorati Tags: , , , , , ,

Ideas for Easy, Inexpensive & Crafty Table Decorations for Thanksgiving

Ideas for Crafty Table Decorations for Thanksgiving

Thanksgiving is coming quickly and every year I’m amazed at the clever ideas people have for decorating their table tops.  I was roaming the internet for interesting ideas and I came across quite a few.   I was intrigued not only by the creativity, but also the fact that many of them were quite inexpensive to do.  I wanted to share a few ideas that I found easy and inexpensive…. so, without further ado…..

Ideas for Easy, Inexpensive & Crafty Table Decorations for Thanksgiving

(1) Gourd Gobblers


Gourd Gobbler Table Decoration


Made from pumpkins these turkey’s look amazing and festive.  I found this creative table decoration over at the Martha Stewart site and I was more than impressed.  It would look great on any table.


(2)  Pumpkin Vases


Pumpkin vase table decoration


Here is a simple and inexpensive Thanksgiving centerpiece idea.  Just gut out a pumpkin and use it as a vase.  I found this idea over at Country Living and it’s a good one.  I’m sure you would get a lot of compliments on it during your Thanksgiving feast.


(3) Goofy Gourd Gang


Goofy Gourd Gang


Here is a great centerpiece if you are doing a separate kids’ table from the adult table.  The kids won’t mind sitting at the kids’ table if this is what it looks like.  ShelterPop shows you how to make these Thanksgiving items step by step.  This is a creative and inexpensive way to decorate the table…. gotta love that.


(4) “Thanks” Table Setting


Thanks table setting


I found this table decor over at Create.Love.Grow and I had to include this table decor.  She writes how she used things from around her house and it cost her $0 to make.  Gotta love that!! This will look great as a Centerpiece for Thanksgiving.


(5)  Pumpkin Tree Tabletop Decoration


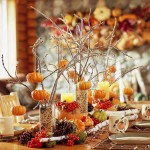
Pumpkin tree tabletop decoration


Isn’t this beautiful?  I love this centerpiece and Better Homes and Gardens explained how easy it is to make this wonderful centerpiece.  My favorite part of this centerpiece are the small pumpkins hanging from the twigs… love it!!


(6) Vase Centerpieces


Vase Centerpieces


I love the color in this centerpiece.  They simply filled clear vases with colorful dried legumes.  Epicurious explains that this Thanksgiving centerpiece is so easy that instead of concentrating on the centerpiece you can use that energy to concentrate on making the Thanksgiving feast.


(7)  Fruitfully Fabulous Centerpiece


Fruitfully Fabulous Centerpiece


Here is a simply, but crafty centerpiece.  It’s another easy, but goodie Thanksgiving centerpiece.  Good Housekeeping shows us how you can easily make this Thanksgiving centerpiece in no time.  Simply dry some sliced citrus food and hot glue them into a band around candles.   It’s just lovely.


(8) Family Tree Centerpiece


Family Tree Centerpiece


What an original idea…. I think it’s just awesome!!  Simply, hang family photos from a table top potted plant and you have an amazing centerpiece for Thanksgiving.  Midwest Living came up with this idea and I think it’s a great idea.  It will be quite the conversation piece.


(9) The Kid’s Table

The Kids Table

As a kid I always hated sitting at the kids’ Table for Thanksgiving.  I felt like I was missing out on all the fun at the adult’s table.  But, I wouldn’t have been so sad if I had a cool Thanksgiving Kid’s Table like this one.  Frog Prince Paperie shows you how to put together this amazing kids’ table that all children are sure to love.


(10) Cranberry Carnation Pyramid


Cranberry Carnation Pyramid


I just love the color in this centerpiece…. what a beautiful red.  I found this beauty over at AllYou and I’m so glad I did.  I might have to give this centerpiece a try this Thanksgiving holiday.  It’s made from carnations, cranberries and apples…. I imagine this centerpiece must smell delicious.

Technorati Tags: , , , , , , , , , , ,

How to Make an Indian Village for Thanksgiving

I have a fun craft for you today.  Today I’m going to show you how to make an Indian Village perfect for the Holiday season.  Thanksgiving is coming quickly and with Thanksgiving comes decorating for the Holiday.  This Indian Village would be a great Thanksgiving decoration.  Let’s do it.

Check out our other Thanksgiving Crafts


How to Make an Indian Village for Thanksgiving


Materials Needed

Printer

Paper

Markers or Crayons

Glue or Paste

Sand, Gravel and Rocks

Twigs

Small Table


Below are the printable templates.  Click on the image to make larger and to print.

8×10 Size Template


Printable 8x10 size template


Large Template


Printable large template


Step 1


Print out template.


Print out template.


Step 2


It is fun to draw Indian like designs all over each teepee.


It is fun to draw Indian like designs all over each teepee.


Step 3


Cut out... Fold... Paste.


Cut out… Fold… Paste.


Step 4


Finished Indian village craft


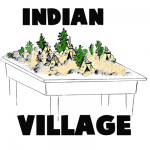
On a table, place a mound of course sand and gravel with rocks, large and small.  The rocks can be placed to hold the sand on the table.  Get twigs and stick in the sand for a forest effect.  Place the wigwams as you wish.  After wigwams are placed on the sand pile, stick a few twigs through the holes to help keep them in place.

Wow, what an amazing Thanksgiving decoration, huh?!  Can you believe just from 4 easy steps you were able to create this Indian Village?  You did an awesome job!!

Technorati Tags: , , , , , , , , , , , , , , ,

Ideas for Displaying Your Kids’ Artwork So You Can See Your Fridge Again

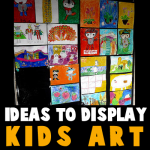
As a parent, I love receiving beautiful artwork from my children. However, there comes a point when you feel like your entire refrigerator is covered with artwork. I have 4 kids, so not only is my fridge covered, but my fireplace’s mantle, my kitchen window, and the rest of my windows are all being taken over with artwork. This got me thinking…what else can I do with the artwork? I would love to see my refrigerator again…what color is it…I want to know….maybe soon I can find out again. 🙂


Ideas for Displaying Your Kids' Artwork So You Can See Your Fridge Again


Now for the ideas. Please comment below to add your own ideas or suggestions…everyone can contribute.

(1) Clothesline Art


Hang childs artwork with clothespins


Hang a Clothesline in your child’s room or playroom (high enough that the child can’t get hurt) and then use clothespins to hang your child’s art.

(2) Curtain Hangers for Art


drapes artwork


This is similar to the clothespin idea, but instead by a curtain hanging system. Instead of hanging curtains with the clips, hang the artwork.  This idea comes from Project Nursery … visit it to find out how she did it.

(3) Plexiglass Table Cover to Display Artwork


Plexiglass Table Cover to Display Artwork


There is a great how-to article, on the Examiner.com, about making a Plexiglass table cover in order to display artwork underneath. You can just go to Home Depot or Lowes and have them cut down a sheet of plexiglass to the same size as your table. Then just  place the plexiglass on top of your child’s art that you want to showcase.

(4) Hang Clipboards to Display Art


Hang Clipboards to Display Art


On a Blog called Clean and Scentsible, we found another way to display your child’s artwork. Hang Clipboards, and place newest artwork on the top layer that is showing. This is a really smart and sensible way to display your child’s artwork.


(5) Vertical Lines of Hanging Yarn


Vertical Lines of Hanging Yarn


I found a great example of hanging art from vertical lines of yarn or string or wire on a site called Spiral Montessori Mama. As this talented teacher / blogger suggests…just hang yarn from the ceiling with tape….then as your child brings home artwork just tape it to the yarn. I like how this teacher places a colorful piece of paper behind each piece of art to sort of frame it or mat it.

(6) Paint a Magnetic Wall – Maybe Even Chalkboard Paint


Paint a Magnetic Wall - Maybe Even Chalkboard Paint


On Zillow.com, I found a great idea. How about paint an entire wall with magnetic paint and then covering it with chalkboard paint (optional). You can then display all of your child’s artwork on a giant wall, instead of your refrigerator. Just a note…I did the same thing…I put 2 coats of magnetic paint and then a coat of chalkboard paint. It isn’t magnetic…although the chalkboard paint works great. I am just telling you this so you know that you might need to coat the wall with many coats of magnetic paint for it to work.

(7) Frame Them on a Special Wall


Frame Kids Artwork on a Special Wall


How about creating a special museum wall in your house….all with your child’s framed artwork. The above picture comes from Inside-OutDesigns.com.

(8) Using a Pocket Display


Using a Pocket Display


I found a simple pocket display case that has 9 pockets on each side of the case. You can then hang it either on a door knob or on the wall without damaging it.  If you want to make one of these one your own (so you don’t have to buy it), you can see a similar sort of creation here.

(9) Give Art as Gifts


Give Art as Gifts


This artwork was found on the blog called Quince and Quire.  This blogger sewed her child’s artwork to a moleskin sketchbook to give to somebody as a gift. This is a great idea…but for somebody who hates sewing, this sounds tedious….how about just using hot glue or even colorful duct tape as a frame. Another idea is finding a notebook that has a clear cover and attaching it underneath the clear cover.

(10) Mod Podge Your Child’s Artwork to Anything


Mod Podge Your Child's Artwork to Anything


You can Mod Podge your kids’ artwork to coasters or any other item such as your child’s bookcase or wooden bed. This will bring your child’s room alive with color…and it is quite easy to do. This was found on the site…Mod Podge Rocks!

(11) Use Artwork for Gift Wrapping Paper


Use Artwork for Gift Wrapping Paper


On Krafty Guts Blog, the blogger used her child’s artwork for wrapping paper. This is a great idea…this makes the child feel so special.

(12) Laminate the Artwork and Use as Placemats


Laminate the Artwork and Use as Placemats


On the blog, Make Create Do, there is an example of a place mat made from a child’s piece of art. This is also a great idea. How special is it to your child that you would make a permanent use for his creativity. Awesome idea.

(13) Showcase Art with Digital Frames


Showcase Art with Digital Frames


I love, love, love this idea. How about you scan all of your child’s work and put them all on permanent display in a digital frame.

(14) Use a L’il DaVinci Store and Display Art Cabinet


Use a L'il DaVinci Store and Display Art Cabinet


This is a really cool idea to have a cabinet that holds up to 50 pages of artwork. It then has a hinge that lets you open up the frame like a book to turn thru the pages. I found it here, see if you like it when you take a closer look.

(15) Make a Puzzles, Notebooks, Stickers, Magnets, Coffee Table Books and Other Items from Artwork


Make a Puzzles, Notebooks, Stickers, Magnets and Other Items from Artwork


On sites like Snapfish.com, you can create all sorts of things from your child’s artwork, such as stickers, puzzles, magnets, notebooks, coffee table books, posters, t-shirts, playing cards, etc.

Technorati Tags: , , , , , , , , , , ,

How To Make A Blarney Stone Craft for Saint Patrick’s Day Celebrations

Blarney Stones are for the luck of the Irish and this Blarney Stone is super simple to make too. St. Patrick’s Day is coming up in the middle of March so it is time to star thinking about the arts and crafts projects that you can make to celebrate the grand occasion. Have fun.

You Might Like Our Other St. Patrick’s Day Crafts Ideas


How To Make A Blarney Stone Craft for Saint Patrick's Day Celebrations


How To Make A Blarney Stone Craft for Saint Patrick’s Day Celebrations

Blarney Stone Crafts Materials and Supplies

* Smooth river rock or other smooth rock, medium sized
* Green paint
* Paint brush
* Glue
* Googly eyes
* Green glitter
* Sequins or jewels, small sized
* Black marker

Blarney Stone Instructions

Step 1.


Wipe the rock off to remove any debris that might be on it.


Wipe the rock off to remove any debris that might be on it.


Step 2.


Paint the entire rock green with the green paint.


Paint the entire rock green with the green paint. While the paint is wet, sprinkle on a bit of the green glitter.

Let the rock dry completely.


Step 3.


While the paint is wet, sprinkle on a bit of the green glitter.


Once dry, glue on the googly eyes…or paint eyes.


Step 4.


Let the rock dry completely.


Draw a letter ‘J’ for the nose.

Draw a smiley face by drawing a letter ‘u’ for the mouth….and draw a curved line on both sides of the ‘u’.


Step 5.


Once dry, glue on the googly eyes and use the marker to dry eyebrows.


Paint an orange beard on it.


You Might Like Our Other St. Patrick’s Day Crafts Ideas

Technorati Tags: , , , , , , , , , , ,

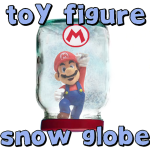
Making Snow Globes with Toy Figures & Glass Jars with Easy Crafts Instructions for Kids

Do you want to make a really cool snow globe? Find a figurine that you don’t play with any more and use that to make a really cool snow globe. This is also a great way to keep a special toy figures on display. Find out how to make this super cool snow globe with a baby food jar (or any old jar).


Making Snow Globes with Toy Figures & Glass Jars with Easy Crafts Instructions for Kids


Making Snow Globes with Toy Figures & Glass Jars with Easy Crafts Instructions for Kids

Crafts Materials Needed

– Baby Food Jar (or larger jars if you want a bigger snow globe)
– Toy Figurine
– Glitter
– Glue Gun (Parental Help Required)
– (Optional) Acrylic Paint and Paint brush to paint the outside of the jar.

Step 1


Making Snow Globes with Toy Figures & Glass Jars with Easy Crafts Instructions for Kids


Firstly, wash the jar and cap and dry them both off. Then take your toy figurine and hot glue it to the baby jar’s lid (Let Mom or Dad Do This Part).

Step 2


Making Snow Globes with Toy Figures & Glass Jars with Easy Crafts Instructions for Kids


Now fill the jar with water and sprinkle in the glitter of your choice.

Step 3


Making Snow Globes with Toy Figures & Glass Jars with Easy Crafts Instructions for Kids


(Let Mom or Dad do this part) Put glue onto the cap and then close the lid tightly on to the jar. Then Seal the jar by gluing all around the edge.

Step 4


Making Snow Globes with Toy Figures & Glass Jars with Easy Crafts Instructions for Kids


This is what your Snow Globe should look like now.


Making Snow Globes with Toy Figures & Glass Jars with Easy Crafts Instructions for Kids


You can then paint (optional) whatever you want to on this snow globe. Since my snow globe is a Super Mario Snow Globe, I put the Mario logo on the jar.


I hope that you had a great time and that your snow globe turned out fantastically.

Technorati Tags: , , , , , , ,