List of Best Drawing Books for Kids : Beginners and Homeschoolers

Here are a list of some of my daughter’s favorite drawing books. Please tell us your favorites and share with your fellow parents and teachers what the best children’s drawing books are.

list of best drawing books for young kids, preschoolers, homeschooled kids

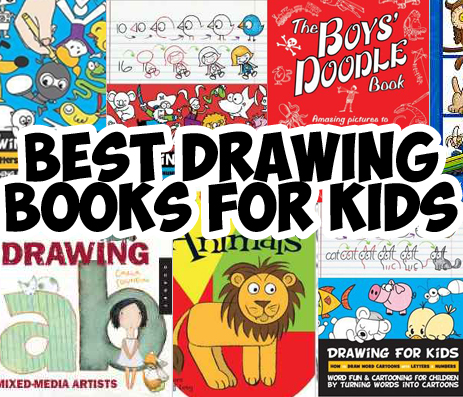
List of Top Drawing Books for Kids (Preschoolers and Elementary School Kids and Homeschoolers)

Drawing for Kids Turn Numbers into Cartoons

Drawing for Kids with Numbers

With this book, the child learns how to turn numbers 0-25 into cute cartoons.

Drawing for Kids : How to Turn Words into Cartoons

Drawing for Kids : learn how to draw cartoons by turning words into cartoons

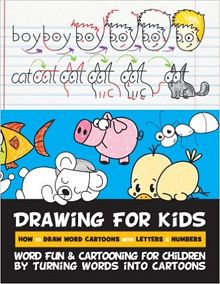
This amazing drawing book shows children how to turn words, such as cat, boy, girl into their respective cartoon. Cool!

Drawing for Kids : Turn Alphabet Letters into Cartoons

kids can learn how to draw with numbers and letters

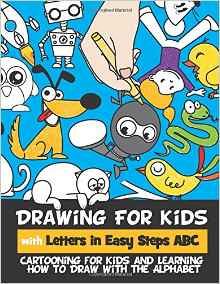
With this book, the child learns how to turn capital alphabet letters A-Z into cute cartoons.

Learn How to Draw 101 Animals

drawing101animals

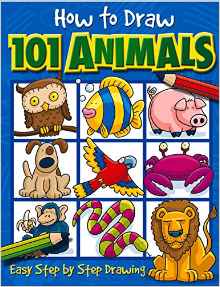
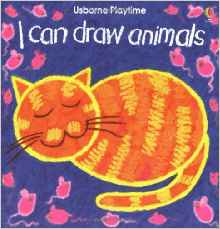
Kids can learn how to draw these cartoon animals with easy, step by step instructions.

Tangle Art – Find Your Creativity

51IXuqP8dbL._SX423_BO1,204,203,200_

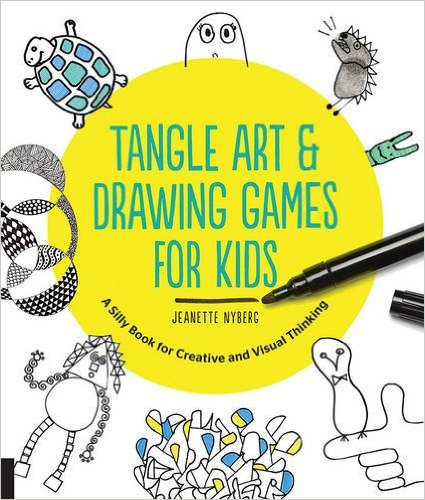
Just be silly and creative – this book sneaks some creativity into your kids life.

2o Ways to Draw a Tree (Part of a series of 20 Ways to Draw a ….)

20 ways to draw

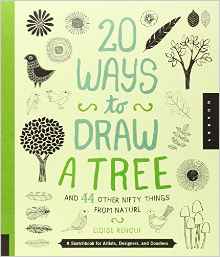
In this series of books (other things…not just trees)…there are stylized drawings of what you want to draw. These aren’t step by step, but rather a way to show the child that they can draw things in many, many different ways…instead of just copying.

The Boys Doodle Book

Boys' Doodle Book

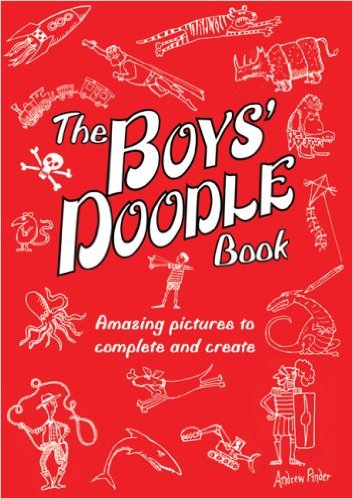
Also, not a step by step book, but rather a book full of incomplete drawings that they can creatively complete.

The Girls’ Doodle Book

girls' doodle book

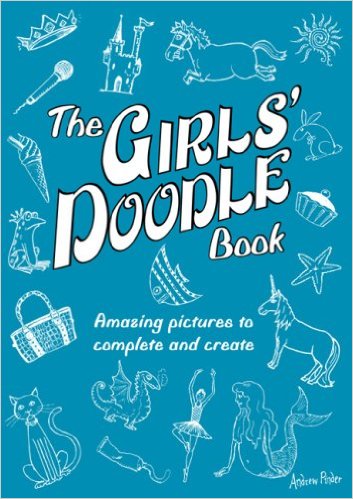
This is just like the Boys’ Doodle Book, but for girls.

Art Start Animals

how to draw animals with basic geometric shapes

This book teaches very basic cartoon drawing with the most basic of shapes.

Drawing Lab for Mixed-Media Artists

drawing-lab for mixed media artists

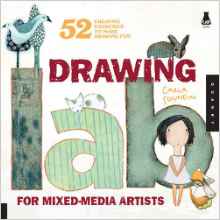
Here is a book filled with fun art project ideas…if your child likes to draw, she/he will love this book.

I Can Draw Animals

icandrawnaimals

A simple step by step drawing book, show in crayon, for young children.

Now Tell Us What Your Kids’ Favorite Drawing Books in the Comments!

Technorati Tags: , , , ,

How to make a Christmas Tree with Thread : Fun and Easy Craft for Kids

Learn how to make this adorable Christmas tree with the following simple-to-follow, step by step instructions by Laura from  Dacian Moon Handmade. She will show you how to make this cute Xmas tree, step by step. Have fun!

You Might Also Like Our Other Christmas Crafts.

How to make a Christmas Tree with Thread : Fun and Easy Craft for Kids

CRAFTS MATERIALS NEEDED:

– thick thread
– craft glue
– string of beads
– scissors
– paper

Step 1.

Make a cone of paper…

… like this.

Stick the corner to keep it in place.

Make the base flat.

Now it can stand.

[ad#ahc]

Step 2.

Fix one end of thread on top of the cone…

… and start to cover it by wrapping the thread…

… like this.

The tree is ready. Now is time to decorate it.

Step 3.

Apply a bit of glue on top of it…

… and fix a bead .

Roll the string of beads around the tree…

… and glue the last one on the base.

Your Christmas tree is ready 😀

You Might Also Like Our Other Christmas Crafts.


How to make Glowing Bottles for Halloween Craft for Kids

Here is a funny decoration idea for Halloween time. This is really easy to do and it glows in the in the dark, which is always fun! This craft tutorial was by Laura from Dacian Moon Handmade  will show you, step by step, how to do it .

How to make Glowing Bottles for Halloween Craft for Kids

How to make Glowing bottles for Halloween

CRAFTS MATERIALS NEEDED:

– two mini bottles
– black permanent marker
– orange glow in the dark acrylic paint
– white glow in the dark acrylic paint
– water

Step 1.

First we decorate bottles, using the black marker.

Draw 5 lines starting at the bottle base, as in the picture…

[ad#ahc]

… then we will connect them with curves.

Add two more rows of curves to finish the spider web.

Step 2.

We will decorate the second one with a bat. Draw a large curve – this will be the upper part.

Starting from one end of the curve, draw a bat wing, like this.

Draw another one on the other side, joining them.

Add a „M”-like head in the middle of the curve.

Color the bat with black, leaving two holes for the eyes.

Step 3.

Put some orange glow paint in the spider web bottle (about 1/3 of it)

Like this.

Fill it with water.

Put the cap and mix well

Step 4.

We will do the same for the bat bottle.

Add white glow paint (about 1/3 of the bottle)

Fill with water.

Put the cap and mix well.

These are our bottles.

And if the lights go out … 😀

I hope that you enjoyed this craft. Come back soon for more crafts ideas that are great for children.

Technorati Tags: , , , ,

How to Make an Autumn Brooch or Pin to Wear to Celebrate the Fall Season or Thanksgiving

Learn how to make a cute little brooch to wear during Fall or you can even wear it on Thanksgiving day 🙂 You can even make one for all of your guests. 🙂 This step by step tutorial is offered by Laura from Dacian Moon Handmade

How to Make an Autumn Brooch or Pin to Wear to Celebrate the Fall Season

How to Make an Autumn Brooch or Pin to Wear to Celebrate the Fall Season

CRAFTS MATERIALS NEEDED:

– a piece of baking paper
– orange  / red beads
– green beads
– scissors
– a small piece of wire
– brooch base

Step 1.

Put wire through the paper at about 0.8 cm from one end…

… like this.

Step 2.

Put beads on the wire…

[ad#ahc]

… making a pattern, like this.

Step 3.

Insert the other end of the wire through the paper so that the beaded part sits right.

Like this.

Cut the paper around the beads, like this.

Step 4.

Bend ends of wire to fit through the holes of the brooch base.

Tie them and cut the extra wire…

Like this.

Step 5.

Bend up the paper, besides beads…

… then twist one end…

… and the other. Your brooch is done 🙂

I hope that you enjoyed this Autumn craft and that it turned out as beautiful as you hoped it would. Come back soon for more crafts.

Technorati Tags: , , , , , , ,

How to make a Phone and Cards Pouch for Your Dad on Fathers Day

Learn how to make a great leather / vinyl wallet for your dad’s gift for Father’s Day. This wallet makes a perfect gift for Father’s Day: it is great to hold his phone and business cards. This step by step tutorial is by by Laura from Dacian Moon Handmade

phone cards cover

How to make a Phone and Cards Pouch for Your Dad on Fathers Day

CRAFTS MATERIALS NEEDED:

– leather or vinyl
– needle and thread
– scissors
– pen
– phone to be sure it fits

IMG_5357

Step 1.

Measure and cut the piece of skin to be 1 cm wider than the phone and 3 times longer.  Should be so long because we must cover one end of the phone, like this…

IMG_5358


[ad#ahc]

… make another fold on the other end for the cards, like this…

IMG_5359


… and the two parts must fit one over the other, like this.

IMG_5360


Step 2.

To easily remove the phone will cut a little the cover. First draw the desired shape…

IMG_5362


… then we cut it out.

IMG_5363


It will look like this.

IMG_5364


Step 3.

Starting at the fold…

IMG_5365


sew the two sides, like this…

IMG_5366


… and the phone fits perfectly.

IMG_5367


Step 4.

We will use a piece of leather to make the bottom of the phone holder. Place it under the phone, like this…

IMG_5369


… and sew the bottom, to fix it in place.

IMG_5370


Also continue to sew the edges.

IMG_5372


Now the phone holder is ready.

IMG_5373


Step 5.

Measure the available part to make the card holder…

IMG_5375


… and sew the edges.

IMG_5376


The card holder is also ready 🙂

IMG_5377

Close it and it will look like this : cute and practical.

IMG_5379

I hope that your wallet / case turned out well and that your dad likes it!

Technorati Tags: , , , , ,

How to Make a Clover with Felt for Saint Patricks Day for Kids

Here are some cute instructions for making felt four leaf clovers Saint Patrick’s Day. Laura from  Dacian Moon Handmade will show you today, how to make a clover out of felt…perfect for Saint Patty’s Day. You can use it to make decorations, or to tie it to a headband or… actually you can make a lot of beautiful things with it.

How to Make a Clover with Felt for Saint Patricks Day for Kids

How to Make a Clover with Felt for Saint Patricks Day for Kids

CRAFTS MATERIALS NEEDED:

– a piece of green felt
– scissors
– needle and thread

IMG_4564

Step 1.

Cut the felt in 4 equal pieces.

IMG_4565

[ad#ahc]

Make a “v” on the middle of top edge of one…

IMG_4566

… then round the corners beside it.

IMG_4567

Do the same for all 4 pieces.

IMG_4568

Step 2.

Start sewing them like in the picture.

IMG_4569

Add the other pieces.

IMG_4570

Bring the two ends together…

IMG_4571

… pull and make a knot. Like this. Make another knot just to be sure.

IMG_4572

Open the “flower” and the clover is ready 😀

IMG_4573

And there you have it, a realistic looking felt clover (or shamrock) to wear on St. Patrick’s Day. I hope that you had fun!

Technorati Tags: , , , , ,

How to Make a Bow Tie for New Year Eve Party

Are you allowed to stay up until midnight on New Years Eve and want to look all dressed up and spiffy? Here is a cute craft for kids to make a bow tie to wear an outfit with a classic style, perfect for any New Year party. Here is the step by step tutorial offered by Laura from Dacian Moon Handmade

You Might Also Like Our Other New Years Crafts

How to Make a Bow Tie for New Year Eve Party

How to Make a Bow Tie for New Year Eve Party

CRAFTS MATERIALS NEEDED:

– material or canvas (a rectangle of  about 8 cm x 5 cm)
– metallic button
– scissors
– ribbon
– needle and thread

IMG_3019

Step 1.

Fold the canvas in two lengthwise.

IMG_3020

Sew the two sides together…

IMG_3021

Like this.

IMG_3022

Step 2.

Bend so that the cloth will be sewn on center.

IMG_3023

Sew the new edge…

[ad#ahc]

IMG_3025

… like this.

IMG_3027

Sew the other edge too.

IMG_3028

Step 3.

Turn it back in front.

IMG_3029

Make a seam in the middle, parallel to the edges.

IMG_3034

Pull the thread…

IMG_3035

… like this.

IMG_3036

Step 4.

Put the button on the needle…

IMG_3037

… and sew it over the middle seam.

IMG_3039


Step 5.

Cut the ribbon in half…

IMG_3041

… and sew it on the back of your bow…

IMG_3042

… like this.

IMG_3043

Your chic bow tie is ready.

IMG_3044

And there you have it, a cute little bow tie to wean on New Years Eve to celebrate the New Year in style! I hope that you had fun!

You Might Also Like Our Other New Years Crafts

Technorati Tags: , , , ,

How to Make a New Years Cube Dice Time Capsule to Celebrate the New Year

Bored and don’t know what to do on New Years Eve or New Years Day? How about making a cube with the numbers 2015 (or whatever year it happens to be when you see this tutorial). A fun thing to do is to write a letter about what you hope for the following year. Put it inside the cube. Don’t look at it until the following year. See how things have changed or if things turned out the way you hoped they would. Or you can just roll it around, toss it around, or just put it up on a shelf.

You Might Also Like Our Other New Years Crafts

How to Make a New Years Cube Dice to Celebrate the New Year

How to Make a New Years Cube Dice to Celebrate the New Year

Step 1

Print out the correct template. This year, you would print out 2015 (but I also included up to 2020) for future New Years. You can either choose, aqua, pink, yellow, or black and white.

2015 Templates

2015-new-years-dice-aqua 2015-new-years-dice-bw 2015-new-years-dice-pink 2015-new-years-dice-yellow

2016 Templates

2016-new-years-dice-aqua 2016-new-years-dice-bw 2016-new-years-dice-pink 2016-new-years-dice-yellow

2017 Templates

2017-new-years-dice-aqua 2017-new-years-dice-bw 2017-new-years-dice-pink 2017-new-years-dice-yellow

[ad#ahc]

2018 Templates

2018-new-years-dice-aqua 2018-new-years-dice-bw 2018-new-years-dice-pink 2018-new-years-dice-yellow

2019 Templates

2019-new-years-dice-aqua 2019-new-years-dice-bw 2019-new-years-dice-pink 2019-new-years-dice-yellow

2020 Templates

2020-new-years-dice-aqua 2020-new-years-dice-bw 2020-new-years-dice-pink 2020-new-years-dice-yellow

How to Put These New Year Cubes Together

After you print out the cube template with the right color and year, then you are going to want to cut it out and then fold on the dotted lines and on the tabs. And then glue the cube together. We already made cubes in another New Years tutorial, why don’t you check out the pictures on that folding tutorial, it is exactly the same. BEFORE YOU CLOSE THE CUBE: Write a note and place it inside the cube. Don’t peek until the following year. See how things have changed since you wrote the note.

There really isn’t much that you can do with this cube, other than put it up somewhere or toss it around with your friends. It is just a cute craft that gives you time to think about the year gone past and the year yet to come. I hope that you enjoy it.

You Might Also Like Our Other New Years Crafts

Technorati Tags: , , , , , , , , , , , ,

How to Make a New Year Countdown to 12 Clock Craft for Preschoolers and Kids

Here is a fun craft for younger kids who can’t stay up to 12:00 yet. You can make a countdown to 12  and have a pre-party with your young children, counting down to 12. This way your children don’t feel like they missed out on any of the New Year celebrations. Step by step tutorial offered by Laura from Dacian Moon Handmade

Check out our other New Years Crafts

NYclock

How to Make a New Year Countdown to 12 Clock Craft for Preschoolers and Kids

CRAFTS MATERIALS NEEDED:

– 2 sheets of blue paper
– paper glue
– white paper
– scissors
– pencil
– eye pin (or a brass fastener)
– crystal (optional)
– 1 auto-adhesive star
– 2 pieces of chenille stem (pipe cleaners)

IMG_3109

Step 1.

Cut the sheets of blue paper in half, lengthwise. You will have 4 rectangles.

IMG_3111

Step 2.

Accordion fold them.

IMG_3112

Like this.

IMG_3113

Step 3.

Apply a layer of glue on the last fold and stick it to the first on the next paper accordion.

IMG_3114

Repeat until you complete the circle.

[ad#ahc]

IMG_3123

Like this.

NOTE: if the space in the middle is too big, put a small piece of tape on the back. It will keep it in place.

IMG_3124

Step 4.

Remove the protective foil of the star and place it on the middle. Like this.

IMG_3125

Cut 4 small rectangles of white paper and write on them „12”, „9”, „6”, „3”.

IMG_3127

Apply a layer of glue on one of them (on the back, of course) …

IMG_3128

… and place it on the clock, in its place.

IMG_3129

Do the same for the other ones.

IMG_3130

Step 5.

If you want to put a crystal or a bead on the eye pin, you can do that now. (Don’t use small beads or crystals with very young children). Put the crystal on the eye pin…

IMG_3132

… then wrap a piece of chenille around the pin, like this.

IMG_3134

Add the second piece of chenille. It will look like this.

IMG_3135

Put the pin through star, fix the chenille steams to point almost at 12, and the clock is ready !

IMG_3136

And there you have it. Use this cool clock to have an early countdown to 12:00 New Year Party! Have Fun!

Check out our other New Years Crafts

Technorati Tags: , , , ,

How to Make Paperclip Christmas Angels : Easy Craft Idea for Kids

You can make a cute little paperclip angel to hang on your Christmas tree or to just decorate your bedroom or house. These are super easy to make and all of the materials are probably sitting around your house somewhere. Laura from Dacian Moon Handmade  will show you today how to make this simple decoration, step by step.

Check out our Christmas Crafts.

How to Make Paperclip Christmas Angels Easy Kids Craft Tutorial

How to Make Paperclip Christmas Angels Easy Kids Craft Tutorial

CRAFTS MATERIALS NEEDED:

– butterfly paperclip
– bead
– ribbon
– sewing pin

Step 1.

Fold the ribbon in two and put it through the bead.

You can help it with the pin.

[ad#ahc]

It will look like this.

Step 2.

Put the ribbon through the paperclip, like this…

…and make a knot over the bead.

Step 3.

Bring the bead near the paperclip…

… and now it looks like an angel 😀

Tie both ends together and your decoration is ready.

And there you have it, a beautiful Christmas Angel. It is so adorable, isn’t it? You can make these as a gift or use it as a Christmas ornament. Merry Christmas!

Check out our Christmas Crafts.

Technorati Tags: , , , , , ,

How to Make a Paper Christmas Tree Craft for Children Tutorial

Learn how to use green construction paper and a pin to form a beautiful Christmas tree that really stands. Laura from Dacian Moon Handmade   will show you how to make a paper Xmas tree, step by step.

Check out our Christmas Crafts.

How to Make a Paper Christmas Tree Craft for Children Tutorial

How to Make a Paper Christmas Tree Craft for Children Tutorial

CRAFTS MATERIALS NEEDED:

– green paper
– scissors
– pencil
– sewing pin

Step 1.

Draw 4 circles on the green paper.

Cut them out.

[ad#ahc]

Step 2.

Take one and fold it in half.

Unfold.

Fold it again in half, on the other side.

Unfold.


Step 3.

Unite two adjacent corners…

… like this.

Repeat for all sides.

Do the same for all discs.

Step 4.

Take the pin…

… and put it through the middle of the littlest one.

Put discs one on top of each other, in increasing order, and the tree is ready.

And there you have it…a stand-up, paper Christmas Tree. You can put it on a table, on a ledge, on a bookshelf, or anywhere else where people can see. Merry Christmas!

Check out our Christmas Crafts.

Technorati Tags: , , , , ,

How to Make Autumn Dolls or Figurines in Easy Craft Idea for Kids

You can make this Autumn themed doll or figurine to celebrate fall, using an acorn cap for the hat and making a leaf out of felt for the “wings” of this little Autumn Fairy. This is a great Autumn-time craft that you will enjoy. Step by step tutorial offered by Laura from Dacian Moon Handmade

How to Make Autumn Dolls or Figurines in Easy Craft Idea for Kids

How to Make Autumn Dolls or Figurines in Easy Craft Idea for Kids

CRAFTS MATERIALS NEEDED:

– yellow and red felt
– pens (or permanent markers) – for eyes and mouth
– wooden bead
– scissors
– cork
– toothpick
– acorn cap
– toothpick
– brown ribbon
– craft glue

Step 1.

Glue the wooden bead on toothpick.

Step 2.

Stick toothpick in cork…

… until there are about 0.5 cm left.

[ad#ahc]

Step 3.

Draw a circle and a rectangle on yellow felt. The circle must be a little bigger than the wooden bead and width of the rectangle must be from the bottom of the cork to the wooden ball.

Also draw a shape like this on red felt.

Step 4.

Cut them out.

Step 5.

Apply a layer of glue on the yellow circle…

… and place it on the wooden bead, like this.

Let it dry.

Next, put a bit of glue inside the acorn cap and on the edges…

… then fix it over the yellow circle.

You have now the head with yellow hair and acorn hat.

Step 6.

Adjust the upper part of the cork…

… like this.

Step 7.

Apply a layer of glue on the rectangle…

… like this…

And cover the cork with it.

Let it dry well.

Wrap the ribbon around the neck, over the yellow rectangle but take care to let the hair free.

Make a knot to keep it in place. You can cut the ribbon ends if they are too long.

Step 8.

Apply a stripe of glue on the lower part of red shape…

… and fix it over the ribbon, like this. Let it dry well.

Now use your pens / markers to add eyes and mouth and your cute doll is ready 😉

I hope your Autumn Fairy Doll turned out great. This would be a great decoration for the Thanksgiving table or any dinner in Autumn. I hope that you had fun. Come back soon for more crafts.

Technorati Tags: , , , , , , ,

How to make a Pen and Pencil Holder for Fall with Seeds and a Cardboard Tube

Here is a pen and pencil holder craft that is easy to make and a great craft for kids during the Autumn / Fall season. This pencil holder is made with a recycled cardboard tube from a toilet paper roll or a paper towel roll. Use seeds and paint or markers to decorate the cardboard tube. Find the crafts instructions below. Your kids will love this one. Below the Step by step tutorial is offered by Laura from Dacian Moon Handmade

How to Make an Autumn Pencil Holder with Colorful Seeds and a Recycled Toilet Paper Roll

How to make a Pen holder decorated with seeds

CRAFTS MATERIALS NEEDED:

– empty paper towel or toilet paper roll
– lid
– pumpkin seeds
– craft glue
– scissors
– paints (silver, gold, black)
– paintbrush

Step 1.

Take the roll…

… and make some cuts on one end, like this.

Bend them outward…

[ad#ahc]

… like this.

Step 2.

Put glue on the folded part …

… and set it on the lid.

Step 3.

Take a seed and apply a layer of glue on one side of it…

… then place it on the roll.

Cover the roll with seeds…

… like this.

Step 4.

You can let it like this or can use metallic paints to add some style to it…or
you can use any colors that you like. If your parents don’t want you to paint,
you can use markers instead.

Like this 🙂

I hope that your pencil / pen holder looks fantastic. Keep it on your desk or give it to some one that you care about.

Technorati Tags: , , , , , , ,

How to Make Mini People or Dolls as Zipper Pulls as Back to School Craft for Kids

This makes a great back to school craft as this can be used to decorate your backpack! My daughter and I made a few of these to give to her special friends at school. We landed up having to make more than 20 of them to give out to everyone who was asking for them. She couldn’t make enough of them because they were so popular. I think you will love these too. They are very easy to make and you can use different materials each time. Any bead size or thread color will work. Just have fun and be creative with it!

How to Make Mini People or Dolls as Zipper Pulls as Back to School Craft for Kids

mini doll zipper pulls

Crafts Materials Needed:

– beads

– embroidery thread, yarn, string, or thread

– pipe cleaners

– scissors

– (Optional) metal snap spring hooks

Step 1

finished-step01-beaded-people-zipper-pulls

I started off with a round bead that already had a face drawn on it. You can use paint or a Sharpie to draw 2 eyes and a mouth on a round bead if you don’t have face beads already.

Then put a pipe cleaner thru the bead. The  beaded head should be in the center of the pipe cleaner, as seen above.

Step 2

finished-step02b-beaded-people-zipper-pulls

– Now put the pipe cleaner that is thru the top of the head back down into the top of the head again until there is a loop….as seen above. The legs (bottom 2 pieces of the pipe cleaner) should match up too.

[ad#ahc]

Step 3

finished-step03-beaded-people-zipper-pulls

Take some embroidery thread (or whatever you have available) and fold it in half a few times (as you see that I did above). Then stick it in the loop hole, as seen above.

finished-step04a-beaded-people-zipper-pulls

If you want to make this a zipper pull, put a metal hook on it (optional…only for zipper pulls). Then Pull the pipe cleaner legs downwards so that the pipe cleaner on top of the head closes down on the hair and hook.

Step 4

finished-step04-beaded-people-zipper-pulls

Cut the loops that are in the embroidery thread so that it resembles hair.

 Step 5

finished-step05a-beaded-people-zipper-pulls

Cut a pipe cleaner in half. Wrap it around the top of the body, so you will have arms.

 Step 5 b

finished-step05b-beaded-people-zipper-pulls

Like in the above picture.

Step 6

finished-step06-beaded-people-zipper-pulls

Take the other half of the pipe cleaner and wrap it around the chest area as I did above.

Step 7

finished-step07-beaded-people-zipper-pulls

– Now we can place beads on the arms and legs. I have long beads, but you can also use multiple small round or oval beads. Then just push the pipe cleaner back into the bead to make it so the beads can’t fall off.

 Step 7 b

finished-step08-beaded-people-zipper-pulls

– This is what it looks like when all the beads are on there.

Finished Bead People

Finished Mini Figures

– My daughter originally only made a few of these for her to give to her closest friends. It lands up everyone in the class were BEGGING her to give them one. We landed up making enough for the entire class. Kids do Love these! Even boys! I hope that you had fun!

Technorati Tags: , , , , , ,

How to Make a Sewn Notebook Cover with Cute Bunny on Top for Girls

School is about to start yet again and we thought you would love this craft to make a hand-sewn notebook cover. It is a super cute notebook cover that includes a stuffed bunny rabbit at the top. You love to write on it!  Laura from Dacian Moon Handmade  will show you, step by step, how make it.

How to Make a Sewn Notebook Cover with Cute Bunny on Top for Girls

How to Make a Sewn Notebook Cover with Cute Bunny on Top for Girls


CRAFTS MATERIALS NEEDED:

– light colored fabric
– pink felt
– pen
– notebook
– scissors
– pink ribbon
– pink bead for the nose
– instant glue
– filling material
– black paint marker

IMG_7041

Step 1

Fold the felt in half and place the notebook over it.

IMG_7043

Let about 0.5 cm on both parts (left and right) and cut the extra felt.

[ad#ahc]

IMG_7044

Step 2.

Sew the two parts together until you reach about 3/4 of it.

IMG_7046

Measure with the notebook if the height is OK. You should have about 2.5 cm to the notebook spire.

IMG_7047

Step 3.

Put the ribbon here …

IMG_7048

… and sew it in place.

IMG_7049

Like this.

IMG_7051

Step 4.

Continue sewing for another 3 cm then fold the felt backward…

IMG_7052

And sew the parts together. This way, the upper part will be stronger.

IMG_7053

Do the same on the other part.

IMG_7054

The Cover will look like this.

IMG_7055

Now separate the default covers of the notebook and put them between the ribbon and felt.

IMG_7056

Like this.

IMG_7057

This is our notebook 😉 Do you think we can make it cuter?

IMG_7058

Step 5.

Of course! Let’s make a bunny! Draw a head with 2 long ears and two small paws on fabric.

IMG_7059

Cut them out.

IMG_7060

Place it again on fabric and draw the outline. Cut the second bunny out.

IMG_7061

Like this.

IMG_7062

Step 6.

Start sewing the two parts together. Let’s start with an ear.

IMG_7063

When you arrive in this point…

IMG_7064

… prepare the filling material…

IMG_7066

… and fill the ear.

IMG_7067

Then continue to sew until you finish the ear. It is important to sew only a little bit over half, then fill it because if you sew first and then fill, you can’t reach all the corners.

IMG_7068

This is the ear finished.

IMG_7069

Continue with the other ear…

IMG_7070

… the paws, and close the head. Don’t forget to fill it when you sew.

IMG_7071

The bunny head looks like this.

IMG_7072

Step 7.

Choose a point where you want the nose to be…

IMG_7073

… and sew the bead there.

IMG_7074

Like this. (If you prefer, you can glue the bead there)

IMG_7075

We will put the bunny in the corner.

IMG_7076

Sew it in place.

IMG_7077

Like this.

IMG_7078

Add the notebook and you are almost ready.

IMG_7080

Use the paint marker to draw 2 eyes and a mouth for the bunny 😉

IMG_7081

And there you have it…the finished notebook cover…the  bunny will keep you company as you write in it…whether is a journal or a school notebook. I hope that you had a lot of fun!

You Might Also Enjoy Our Other Back to School Crafts

Technorati Tags: , , , , , , ,

How to Make Removable Nail Art for 4th of July : Fun Craft Idea for Independence Day

This is an adorable craft idea for little girls and teenage girls on the Fourth of July. By using mailing labels, you can make very patriotic nail art that can be taken off easily after the celebrations have finished. Laura from Dacian Moon Handmade  will show you, step by step, how to have a beautiful 4th July themed manicure.

How to Make Removable Nail Art for 4th of July  : Fun Craft Idea for Independence Day

How to Make Removable Nail Art for 4th of July  : Fun Craft Idea for Independence Day

CRAFTS MATERIALS NEEDED:

– white labels
– pencil
– red marker
– blue marker
– scissors

IMG_5989

Step 1.

Place a finger over one label…

IMG_5990

And draws approximately the contour of the nail.

IMG_5991


Do the same for all the fingers.

[ad#ahc]

1

 Step 2.

Now is time to decorate them. Draw a little heart on each of them.

IMG_5993

Like this.

2

Delineates the left corner of the heart , like this.

IMG_5995

Step 3.

Let’s add some colors. Make the upper left corner of the heart blue (using the blue marker).

IMG_5996

Like this.

IMG_5997

Then, using the red marker, draw the lines on the rest of the heart.

IMG_5998

Like this.

IMG_5999

Repeat for all fingers.

IMG_6000

Step 4.

If you have space, you can write on top of the heart “4 July”.

IMG_6001

Like this.

IMG_6002

Step 5.

Cut them out.

IMG_6003

Now our nail art looks like this.

IMG_6004

Remove the protection foil of the label…

IMG_6005

And place it on your nail.

IMG_6006

This is your cute 4th July themed manicure. It can be easily removed by detaching it from your nails.

IMG_6009

Now you will look amazing at the Fourth of July Parade and cookouts and parties. I hope that you have an amazing Independence Day!

Technorati Tags: , , , , , , ,