How to Make Gloves with Claws for Halloween

Are you still trying to figure out how to add an extra scary effect to your Halloween costume this year?  Well, I just might have the perfect idea for you.  Why not make these Gloves with Claws for Halloween?  They are sure to make any costume you are planning to wear even more scary.  Even if you are planning to be a cat this year…. you can’t do it without claws or your costume is just not finished.  Add these scary Gloves with Claws for a truly scary effect this Halloween.  Let’s get started.
Check out our other Halloween Crafts.

Laura from Dacian Moon Handmade  will show you, step by step, how to make this craft.


How to make a Glove with claws for Halloween


Materials Needed

– gloves
– a piece of black canvas
– scissors
– needle and thread


Step 1

Cut 5 rounded triangles from the canvas.


Like this.


Step 2

Using the needle and thread, sew the lower part of one triangle to one glove finger (where the nails should be)…


… like this.


Do the same for all the triangles / fingers. Repeat for the other glove…


… and they are ready to be worn.


There is something about adding claws to any costume that makes it scary.  Add these scary gloves with claws to your costume and give it an extra creepy effect.

Technorati Tags: , , , , , , , , , ,

11 Cool Door Decorating Crafts for Halloween


11 Cool Door Decorating Crafts for Halloween


Halloween door decorations are so important….. After all, this is the first thing people will see when they come trick or treating at your house.  Sure, you can purchase a nice door decoration for Halloween, but if you are a crafty person or just want to save some money why not make a Halloween door decoration yourself?  I have searched the internet for what I thought was some of the coolest door decorating crafts for Halloween.  I came up with 11 of them….. you are sure to find at least one you love.  So, without further ado….

Check out our other Halloween Crafts.

11 Cool Door Decorating Crafts for Halloween

(1)  Candy Corn Door Decoration


Candy Corn Door Decoration


There is one candy in particular that is very popular during the Halloween season.  Can you guess which candy it is that I’m talking about?  Candy Corn, of course.  Better Homes and Gardens shows you how to make this adorable Candy Corn Door Decoration.  It is very festive!!


(2)   Wriggling Snake Wreath


Wriggling Snake Wreath


Isn’t this wreath dark and scary?  It is perfect for Halloween.  I found this Door Decorating craft over at Martha Stewart and I thought it was really beautiful…. in a dark, morbid way.  I love the snakes that are wriggling all over this wreath.  Check out the site for all the craft details.


(3)  Felt Bats


Felt Bats


I love these bats…. they are very realistic looking.  I love how they have them gathered all around the front door.  This is perfectly scary….. just like Halloween should be.  Check out Country Living for all the batty details.


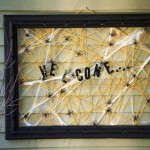
(4)  Halloween Welcome Sign


Halloween Welcome Sign


Halloween isn’t about scaring people away….. It is about bringing them closer.  Sure we like to scare people and creeping them out during this Holiday…. but it is also about welcoming them to your house and offering them either a Trick or a Treat.  Why not welcome them with this Welcome Door Sign I found over at the DIY Network.


(5)  Gaudy Halloween Wreath


Gaudy Halloween Wreath


This is a really cool Halloween Door Decorating Craft.  It looks like something you could buy at a store, but it’s not.  It’s completely hand made and the items that were used for this craft you can pick them up at a Dollar Store…  making this craft very cheap to make.  Get all the details at La La Bliss.


(6)  Felt Flower Halloween Wreath


Felt Flower Halloween Wreath


I love this wreath….. it is absolutely beautiful.  No one will believe you actually made it yourself…. they will think you bought it.  I found this gorgeous Halloween Wreath at Living Locurto…. you need to check it out for yourself.


(7)  BOOtiful Burlap Wreath


BOOtiful Burlap Wreath


Here is another awesome Halloween Door Decorating Craft…. it is a BOOtiful Burlap Wreath.  The black burlap is perfect for Halloween.  I found this Halloween craft over at Craftaholics Anonymous and I love it.  You will be using this Halloween Wreath for years to come.


(8)  Spooky “EEK” Wreath


Spooky EEK Wreath


Isn’t this Halloween Wreath cool?  It is made from wired ribbon with skulls on it.  She cut them into strips and ties them on a wreath.  I love the idea…. not only fun, but it turned out to be a really awesome wreath.  Check out The Evolution of Home for all the crafty details.


(9)  Frankenstein the Door


Frankenstein the Door


Ok, this door is just AMAZING!!  I found this door decorating idea over at Mel Designs and I love, love, love it!!  She took her green colored door and made it into Frankenstein.  I know, not everyone’s door is green…. but with just a little bit of imagination any door can be a Halloween Character.


(10)  Witches Broom Door Decoration


Witches Broom Door Decoration


I love this Halloween door decoration.  I like that it isn’t the usual Halloween Wreath…. instead Martha Stewart shows us how you can take 2 brooms and wire them together to make an “unwelcoming” door decoration.  Great idea!!


(11)  Eyeball Wreath


Eyeball Wreath


This craft made from glow-in-the-dark eyeballs is a cool Door Decorating Craft…. it is PERFECT for Halloween.  Kids will love staring at this eerie Eyeball Wreath.  But, more than that…. kids will love making this wreath.  You can get all the craft details at at Country Living.

Technorati Tags: , , , , , , , , , , , ,

18 Cool Mummy Craft Ideas for Halloween


14 Cool Mummy Craft Ideas for Halloween


You are in for a treat today.  I have searched the internet to find what I thought was the best in Mummy crafts for Halloween.  I came up with 18 of my favorite Halloween Mummy crafts.  They are all totally creative and equally creepy.  Some of them are edible, some are meant to be used as decorations and others are actually moveable mummies.  But, I’m sure you will find them all fun and festive.  I hope you have a blast looking at all of these cool mummy craft ideas for Halloween…. I know I did.  So, without further ado…. let’s get started.

Check out our other Halloween Crafts.

18 Cool Mummy Craft Ideas for Halloween

(1)  Craft Stick Mummy


Craft Stick Mummy


I found this silly craft over at First Palette.  This Halloween Mummy Craft is made out of craft sticks and guaze.  And, the finished item is perfectly creepy for Halloween.  Make a few and put them around the house this Halloween.


(2)  Mummy Candy Holder


Mummy Candy Holder


Are you having a Halloween Party this year?  If you are I have the perfect decorations and party favors for you.  How about making this Halloween Mummy Craft.  It’s a Mummy Candy Holder…. the kids are sure to love it.  Check out Parents for all the craft details.


(3) Printable Paper Mummy Toy


Printable Paper Mummy Toy


Here is a paper toy craft from this site…for a paper mummy. This is very easy to make and a lot of fun to play with. Find out how here.

(4)  Bendable Mummy


Bendable Mummy


Here is a great Halloween craft that is made from an old shirt.  This is a great craft to recycle those old T-shirts.  Got to love recyclable crafts.  You want the craft details?  Check out Family Sponge.


(5)  Mummy Cupcakes


Mummy Cupcakes


Ok, I love the yummy crafts…. the edible ones.  Well, these Mummy Cupcakes are certainly no exception.  They are adorable…. and they look delicious.  Get the entire Mummy recipe at The Craft Patch….. make sure to check it out.


(6)  Mummy Sign


Mummy Sign


If you are looking for an outside Halloween decoration craft…. then you have found it here.  I found this Mummy craft over at Woman’s Day.  It is so terribly cute…. I just adore it.  This craft is for the more mature as there is a Saber Saw being used.   Adult Supervision is a must for this craft.

 (7) Mummy Bowling


Mummy Bowling


My daughter’s Girl Scouts troop made these for a Halloween Fair party they had. The Brownies and Daisies loves playing Mummy Bowling. Find out how to make these out of water bottles here.

(8)  Mummy Cookies


Mummy Cookies


Are you throwing a Halloween Party?  If so, you know that you cannot have a Halloween Party without some Halloween Cookies.  And, Halloween is just not Halloween without some Mummy treats.  So, make sure to check out this Mummy Cookie recipe I found over at Crystal and Comp….. the kids are sure to love them!!


(9)  Origami Mummy


Origami Mummy


Here is a simple fun Halloween Mummy craft you are sure to enjoy.  It is an Origami Mummy.  You simply need some origami paper, googly eyes and magic marker and you are good to go.  Make a few and decorate your room for Halloween.  Check out the entire craft at Activity Village.


(10)  Mummy Pumpkins


Mummy Pumpkins


Check out this awesome Halloween Mummy craft.  It combines two of the most popular items for Halloween…. a Pumpkin and Mummy.  It is just so fitting for a Halloween decoration.  You can see the Halloween craft in its entirety by going to Celeb Baby Laundry.

(11) Bead Pipe Cleaner and Bandages Mummy


Bead Pipe Cleaner and Bandages Mummy


Find out how to make these mummies with movable arms and legs. All you will need is bandages, pipe cleaners, and a bead. Learn how to make these mummies with the following instructions.

(12)  Juice Box Mummy


Juice Box Mummy


If you are anything like me…. you have tons of juice boxes at home.  I always try to come up with crafts that use empty juice boxes because I hate just throwing the empty juice boxes away.  Well, when I found this Mummy craft made from recycled juice boxes I was overjoyed.  Check it out for yourself at Kaboose.


(13)  Mummy Jars


Mummy Jars


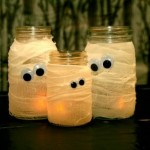
This is one of my favorite Mummy crafts i found.  It seems to be really easy, but a ton of fun.  Plus, look at the outcome…. you have these glowing mummy jars that can be placed around the house as a Halloween Decoration.  You can take a look at the craft for yourself over at Crafts reDesigned.


(14)  Mummy Door Hanger


Mummy Door Hanger


This Mummy craft is pretty darn cute.  I found the craft over at TLC and I think it is perfect for Halloween.  It can be put on your front door for all the Trick-or-Treaters to see or simply place it on one of your many indoor doors as an inside Halloween Decoration.


(15)  Aged Mummy


Aged Mummy


I love this Mummy craft.  Do you know why?  Because Craftaholics Anonymous made it look pretty authentic by dirtying up the gauze around the mummy’s body.  I love that.    Make sure to check out her site as she will show you too how to make this Aged Mummy.


(16)  Tissue Paper Mummies


Tissue Paper Mummies


I found this great Halloween Mummy craft over at Happy Hooligans.  And, it is super cute!!  They simply used recycled empty toilet paper rolls and white tissue paper…. and these mummies turned out amazing.  They are perfect for decorating…. the kids will love telling everyone they made the mummies themselves.

 (17) Mummy Trick-or-Treat Baskets


Mummy Trick-or-Treat Baskets


Find out how to make these trick-or-treat baskets – it is a lot easier than you would think. They come out looking really unique and fun. Find the instructions here.

(18)  Egyptian Mummy


Egyptian Mummy


Now, I know this isn’t exactly the kind of Mummy you think of when you think of Halloween mummies.  But, I love this craft and had to include it once I found it.  Check it out over at 123 Peppy…. I think you will like it too.

Technorati Tags: , , , , , , ,

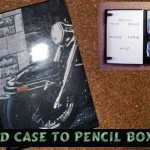
How to Turn a CD Case into a Pencil Box

I have a great craft today that will help you keep your pens and pencils in one place.  In this post I will show you how to turn a CD Case into a Pencil Box.  This creative craft is easy and it is a lot of fun.  With this pencil box you can keep your notes or your schedule on the left hand side while you keep your pens and pencils in the right side.  Close up the pencil box and throw it in your school bag and you are good to go.  So, grab the materials needed and let’s get started.

Check out our other Back to School Crafts.

Laura from Dacian Moon Handmade will show you this craft step-by-step.


Materials Needed

– CD case
– favorite picture (A4 format)
– craft glue
– pen
– scissors
– needle and thread
– light blue cotton piece
– wide elastic band
– a sheet of white cardboard


Step 1

Open the CD case and measure the cloth on the right side.


Cut it to the right dimensions.


Step 2

Measure the elastic band on the same side and cut it a little wider.


Bend the band over the edge of the cloth…


… and sew it there…


… like this.


Bring it to the front and bend the other end over the cloth, like this.


Sew it there.


Sew a stitch at each centimeter. This will help to determine the places for pencils.


Step 3

Measure another elastic band …


… and sew it on the lower part of the fabric.


Step 4

Turn the fabric backwards…


… and apply a layer of glue on it…


… and put it in its place. Press and then let the glue dry.


Step 5

Take the white cardboard…


… and measure the left side of CD Case.


Place it under the clamps.


Now you can use it to write things.


I will write my schedule on it.


Add some pencils and the interior of your pencil box is ready.


Step 6

Let’s make the exterior now. Turn over the CD case.


Take the picture…


… and measure it on the CD case.


Cut it at the right dimension and put it between the plastic wrap and the case.


It will look like this.


Now close the case and your pencil box is ready.


How awesome is this pencil box?  It’s really great and will come in handy for school or at home for homework.  Enjoy it!!

Technorati Tags: , , , , , , , , , ,

How to Make a Cheerful Lunch Box

In this post I’m going to show you how to make a fun and cheerful lunch box.  School has just started and one of the kids favorite times of day is lunch time.  You know what would make it more memorable for them is to make this lunch box craft with your child.  Your child will be so proud to take their homemade lunch box to school with them.  Plus, there will surely be no other person with a matching lunch box.  So, grab the materials needed and let’s get started.

Check out our other Back to School Crafts.

Laura from Dacian Moon Handmade   will show you, step by step, how to make this cheerful and girlish lunch box.


Materials Needed

– recycled box
– cotton cloth
– pen
– craft glue
– scissors
– tulle pieces
– bead
– needle and thread
– auto-adhesive crystal bead


Step 1

Cut 3 squares of tulle…


… place one on top of the other…


… and sew the bead on the middle…


… like this.


Step 2

Place the cloth over the box lid and mark the contour.


Cut it out…


… like this.


Sew the tulle flower on the middle of it…


… like this.


Step 3

Remove (as much as you can) the label on the lid, then add glue on it…


… like this…


… and place the decorated cloth on it.


Step 4

Now, that the lid is ready, is time to decorate the box.


Place the cloth over it and measure the height.


Cut a strip that measures that height.


Apply a layer of glue on it…


… and cover the box. I made some folds on the front to make it less plain.


Take the auto-adhesive crystal…


… and use it to highlight the folds.


Now the decorated lunch box is ready.


Now you have no ordinary lunch box.  You have a very girly and fun lunch box that no other person will have.  Enjoy it!!

Technorati Tags: , , , , , , , ,

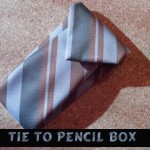
How to Make a Pencil Box using a Tie

Today I have a super creative and fun craft for you.  I’m going to show you how to make a pencil box using a tie.  Ask your Dad for one…. I’m sure he has some that he doesn’t even wear anymore.  And, what a great way to recycle those ties that aren’t worn anymore.   After you make this craft you will have a functioning pencil box… and one that no one else has.  How cool is that?!  So, grab the materials needed and let’s get started.

Check out some other Necktie Crafts.

Laura from Dacian Moon Handmade   will show you how to make this craft, step by step.


Materials Needed

– tie
– needle and thread
– scissors
– satin ribbon
– auto-adhesive velcro


Step 1

Measure the size of the pencil box. Should be slightly larger than a pen.


Bend the rest of the tie over it and mark this size.


Cut on the marking.


It will look like this.


Make a curve cut in the front, like in the picture.


Step 2

Take the satin ribbon…


… and sew it around the front part…


… to create a border, like this.


Sew the front to the rear to stay in place.


It will look like this.


Step 3

Take the auto-adhesive velcro…


… and place one part on the closing part and the other in the corresponding point on the front part. Like this.


Now you can put pencils in it…


… close it, and it’s ready to use.


And, that’s it.  You just created a pencil box using a tie.  Doesn’t it feel great to recycle something that is no longer being used?  It sure does.

Technorati Tags: , , , , , , , , , , , , , , , ,

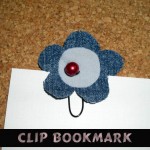
How to Make a Clip Bookmark

One thing I never can find when I need one is a bookmark.  And, you can always use a bookmark in school to mark your homework spot in your textbooks.  So because of that…. today I’m going to show you how to make a Clip Bookmark.  Not only is it super cute, but it is also super effective  in keeping your spot…. after all it is a clip that is sure to hold tight.  So, grab the materials needed for this craft and let’s get started.

Check out our other Bookmark Crafts.

Laura from  Dacian Moon Handmade  will show you, step by step, how to do this craft.


Materials Needed

– paper clip
– one piece dark denim
– one piece light denim
– glass pearl
– pen
– needle and thread


Step 1

Draw a flower on the dark denim…


… and a circle on light denim.


Cut them out.


Step 2

Take the flower…


… and sew the circle on it.


On the back we will place the clip and sew it there.


Turn the bookmark over. The stitches are visible, but we will mask that by sewing the glass pearl over them.


Like this. The bookmark is ready to use.


Wasn’t that easy?  And, so much fun!!  Now, you have an awesome Clip Bookmark perfect for bookmarking your homework spot in your textbooks.  Enjoy!!

Technorati Tags: , , , , , , , , , ,

How to Make a Handkerchief Bunny Cup Cover

Today I’m going to show you how to make a Handkerchief Bunny Cup Cover.  If you don’t have a Handkerchief available…. you might have to ask one of your grandparents to borrow one for this craft.  You are going to be folding the handkerchief to create an Easter Bunny.  Once completed, this craft is perfect to use as an Easter decoration this Easter.  It would look great on any tabletop.  So, grab the materials needed and let’s get started.

Check out our other Easter Crafts.


How to Make a Handkerchief Bunny Cup Cover


Materials Needed

Handkerchief

Cup


Step 1


Fold hankie over.


Fold hankie over.


Step 2


It should look like this.


It should look like this.


Step 3


turn so fold is at bottom.


First, turn so fold is at bottom.  Then… Fold up bottom about 2 inches.  Turn over.


Step 4


Fold B & C over as seen.


Fold B & C over as seen.


It should look like this.


It should look like this.  Turn over.


Step 5


It should look like this.


It should look like this.


Step 6


Bend A down.


Bend A down.


Step 7


Now tie a bow around the neck ….and for a face, draw eyes and nose or cut out felt shapes for facial features. Then put it over a cup or glass.

There you have it…. you just finished your Handkerchief Bunny Cup Cover.  Now, use it to decorate your tabletop for Easter.  People will love it!!

Technorati Tags: , , , , , , , , , , , ,

How to Make a Plush Bunny for Easter

When you think of Easter what is one of the characters you think of?  A bunny, of course.  Well, today I’m going to show you how to make a Plush Bunny.  This bunny is perfect for the upcoming Easter Holiday, but honestly can be made and enjoyed any time of the year.  Made with felt and some cotton for stuffing this bunny is sure to be soft and cuddly.  Make it as big or as small as you would like.  We made our bunny pretty small.  So, grab the materials needed and let’s get started.

Check out our other Easter Crafts.


Materials Needed

– string and needles
– scissors
– felt / fabric
– paper
– pencil
– paint
– 1 toothpick
– wool / cotton – things to stuff (I used 2 cotton pads for that)


Step 1

Draw the pattern on the paper, like this.


Use the scissors to cut it out.


Step 2

Fold the felt in half, place the bunny pattern on it and trace it there.


Step 3

Cut the bunny out of felt (remember, you folded the felt before that so you’ll have 2 bunnies of felt now).


Step 4

Sew the two bunnies starting at the bottom. Use a blanket stitch along the sides.


To make a blanket stitch, push the needle through the fabric then pull the needle through the loop.


Sew as far as you are comfortable before stuffing. The size of the opening will depend on the size of your doll.


Step 5

Prepare your stuffing material: I made little pieces of the cotton pads.


Place the stuffing material in the bunny, taking care to fill all available places.


It should look like that.


Step 6

Sew it shut.


Now the bunny looks like that.


Step 7

Using the toothpick and some paint add eyes and a mouth.


Look how cute he is !
You can continue to decorate it if you feel like it.


Awesome job!!  You just finished your Plush Bunny.  Isn’t it a cutie patootie?  How did your bunny turn out?  Let me know in the comments below.  And, take a picture of it and add that to the comment too… I’d love to see it.

Technorati Tags: , , , , , , , , , , , ,

How to Make an Organizer out of Old Plastic Bottles

Today I have a super easy craft that is very useful.  I’m going to show you how to make an Organizer out of Old Plastic Bottles or Jars.  This craft is a great way to recycle those old plastic bottles and jars.  And, the outcome is a beautiful organizer.  You will need a little bit of adult help as you will need to use a cutter to cut the plastic bottles all different sizes.  So, grab the materials needed and let’s get this craft started.

Check out our other Plastic Bottle Crafts.


Materials Needed

Old plastic bottles and jars

Fabric

Glue

Scissors, cutters (Adult Help)

Ribbon


Step 1

Collect a few jars and cut them in different heights as shown.


Step 2

Cover the jars with fabric and glue it in place as shown. Place the jars together and glue them on a piece of cardboard.


Step 3

Draw around the jars and cut it out so that the base looks like it is shown


Step 4

Add a ribbon and your Organizer is finished.


And, that is it…. you have a beautiful organizer made simply out of old Plastic Bottles and Jars.  Now, the question is….. what are you going to organize?  What are you waiting for… get started.

Technorati Tags: , , , , , , , , , , ,

How to Make Paper from Rags

I have a fun and creative craft for you today.  I’m going to show you how to make paper from rags.  The craft is a lot of fun…. a lot of work, but tons of fun.  At different steps in this craft you will need parental help.  There are quite a few parts where you will be using adult tools and they will need to help you through this…. each of these steps are marked in red.  So, grab some white cotton or linen rags and the rest of the craft materials and let’s get started.


How to Make Paper from Rags


Materials Needed

White Cotton or Linen Rags

Scissors

Non-Aluminum Pot

Oven (Parental Help)

Baking Soda

Sink

Strainer

Blender (Parental Help)

2 Art Frames of the Same Size

Staple Gun (Parental Help)

Window Screen

Fabric or Felt

Sponge


Step 1 & 2


Cut rags into small strips.


Use clean white cotton or linen rags.

Cut rags into small strips.


Step 3


Cut strips of rags into smaller bits and pieces.


Cut strips of rags into smaller bits and pieces.  (Parental Help) Place rag pieces in Non-Aluminum Pot with a lot of water.  Add a few spoonfuls of baking soda.  Let boil for at least an hour.


Step 4


Wash all of the baking soda off of the fabric.


Place fabric in a strainer.  Wash all of the baking soda off of the fabric.


Step 5


Add soggy chunks of rags into blender


(Parental Help Needed) Add soggy chunks of rags into blender with combo of 50% water and 50% rags.  Grind these rag chunks into like a smooth paste.


Step 6


find 2 art frames that are exactly the same size


To make paper, we need a mold and deckle.  To do this…. find 2 art frames that are exactly the same size.


Staple gun a window screen down on one of the frames.


(Parental Help Needed) Staple gun a window screen down on one of the frames.


you have your mold and deckle.


Here you have your mold and deckle.


Dip up pulp unto the screen.


Dip up pulp unto the screen.  Slush screen back and forth until water runs out.


Step 7


place fabric or felt down.


Firstly, place fabric or felt down.  Then place mold face down on fabric with pulp between fabric and mold.


Use a sponge to press into the fabric to soak up the excess water.


Use a sponge to press into the fabric to soak up the excess water.  Then slowly lift up mold to leave the pulp that is left.  To make more paper just re-do step 6d thru 7b with fresh, dry fabric or felt.


Step 8


Paper is done when it is completely dry.


Paper is done when it is completely dry.

And, there you have it….. you have just made paper from rags.  Don’t you feel awesome?!  That was a lot of work, but so worth it.  Now, go enjoy your paper.

Technorati Tags: , , , , , , , , , , ,

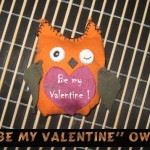
How to Make a “Be My Valentine” Owl

Today I’m going to show you how to make a stuffed Owl toy.  And, not just any stuffed Owl toy, but a “Be My Valentine” Owl that you can give to someone special this Valentines Day.  Imagine their surprise when they receive something that you made yourself.  Or, if you would prefer to keep it…. don’t even give it to someone.  Instead of writing “Be My Valentine” on the heart you can leave it blank or write whatever message you would like.  So, whether it is for you or someone special…. either way it is sure to be loved.  Let’s get started.

Check out our other Valentines Day Crafts.

Tutorial offered by Laura from Dacian Moon Handmade.


Materials Needed

– three pieces of fabric (a large piece – about 16 cm x16 cm – the color that the owl will have, a smaller piece in a contrasting color and a red piece of about 5 cm x 5 cm)
– small pieces of white and black (or brown) leather
– scissors
– pen
– stuffing material (I used some cotton pads)
– needle and thread


Step 1

Fold the large fabric piece in half.


Draw the outline of the owl using your pen. Like this.


Cut it out. You will find it useful to use some pins to keep the two parts together.


It will look like this.


Step 2

Start sewing the two parts together…


… like this.


Stop when you reach the ears.


Sew the other side too.


Step 3

Turn it inside out.


Prepare the stuffing material .


I tore the cotton pads into small fluffy pieces.


Stuff your little bird so that it has a wonderfully squishy and cuddly softness.


When you are satisfied, sew the top.


Like this.


Step 4

Draw two circles on the piece of white leather.


Cut them out.


Apply a layer of glue on the back of one…


… and place it where the eye should be. Do the same with the other one.


Take the black / brown leather…


… and cut out a diamond from it.


This is the beak and we will stick it between the two eyes.


Use the pen to give it some personality by finishing the eyes.


Step 5

Cut 2 wings from the fabric in contrasting color. Like this.


Then sew them on the two sides of the owl…


… like this.


Step 6

Draw a heart on red fabric.


Cut it out, then apply a layer of glue on its back.


Place it under the beak, like this.


Now you can let it like this, decorate it or write “Be my Valentine !” on it, like I did.


And, there you have it…. you just finished the “Be My Valentine” Owl.  Did you make your owl like mine or did you do something different?  Let me know in the comments below.  If you want, take a picture of the owl and share that too in the comments…. I’d love to see it.

Technorati Tags: , , , , , , , , , , ,

How to Make a Valentines Gift for Her

Today I’m going to show you how to make a Valentines Gift for Her.  It is a lace choker and the end result is just simply beautiful.  Any female would love to receive this as a gift.  It is a perfect gift for your Mom, Aunt or even your someone special.  We will even make a cardboard heart that the choker is placed on to make presenting this gift even more lovely.  So, grab the materials needed and let’s get started.

Check out our other Valentines Day Crafts.

Laura from Dacian Moon Handmade will show you how to make this lovely gift.


Materials Needed

– patterned cardboard
– organza (a rectangle of about 10 cm x 10 cm)
– lace (it will be a choker so you can measure to fit your neck )
– satin ribbon
– scissors
– needle and thread
– pencil
– card punch


Step 1

Cut the organza piece in half.


Take one half and fold it in two.


Now, sew the two parts (of the folded half) around the corners…


… like this.


Pull thread to form the petals.


Make a knot to keep it in place.


It will look like this.


Step 2

Repeat the first step to make anther one.


Step 3

Take about 12 cm of the satin ribbon…


And wrap it around your finger…


… like this.


When you reach the end, sew it to keep it in place.


Step 4

Put the satin part through the middle of one piece with petals and sew it there.


Like this.


Add the second part with petals…


And sew it.


Now the flower is ready.


Step 5

Take the lace…


… and find its middle.


Sew the flower there …


… like this.


Step 6

Cut the remaining satin ribbon in two…


… and sew them at lace ends.


The necklace is now ready.


Step 7

Take the cardboard…


… and draw a heart on it (about 12 cm x 12 cm)


Cut it out.


Make a hole in the upper right part…


… like this.


Fold the necklace like this…


… and place it on top of the heart, under the hole.


Mark a point under the folded necklace…


… and make another hole there.


We will put a small ribbon through these holes to keep the necklace on the base.


It is looking like this on the backside.


You can tie the two parts of ribbon or you can use a double adhesive band to keep them in place.


So, this is the gift…


… and this is the necklace.


Doesn’t this Choker Valentines Gift for Her turn out lovely?  Any girl would love receiving this as a gift.  How did your Choker turn out?  Let me know in the comments below.  And, don’t forget to add a picture…. I’d love to see it.

Technorati Tags: , , , , , , , , , ,

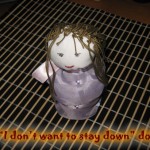
How to Make an “I Don’t Want to Stay Down” Doll

Today I’m going to show you how to make a traditional Romanian Toy.  It is called a “Hopa Mitica” Doll.  But, we will call it an “I Don’t Want to Stay Down” Doll because this doll will not stay down.  When you try to lay it down it will pop right back up.  It’s a cute, funny toy that will be a ton of fun to make…. almost as much fun as it will be playing with the Doll.  So, grab the materials needed and let’s get started with the crafting fun.

Check out our other Doll Making Crafts.

Laura from Dacian Moon Handmade will show you this craft step-by-step.


Our doll will not be made of wood, so …


Materials Needed

– round top (I use a round top from a roll-on)
– scissors
– a red marker and a black one
– 2 cloth pieces – one white or light pink for the face and one colored for the dress
– anti-shock wrap (bubble wrap)
– yarn (whatever color you want her hair to be) and needle
– 1 toothpick
– weights (could be anything heavy but small, it should stay on the bottom of the round top.)
– one piece of ribbon


Step 1

Make a ball (not perfect, of course) from the bubble wrap…


… roll up the white cloth around it…


… and tie it with a piece of yarn. This will be the head.


Step 2

Use the needle to add hair to the head, like in the picture.


Cut the yarn near the needle…


… and make a knot (or two) with the two parts of yarn.


Add as many yarn pieces until you are happy with the result. An alternate method is to glue the yarn to the head of the doll.


Step 3

Now we will place the weights in the round top. They should stay on the bottom of it. You can place there just enough weights to keep the round top up. If you will add more, the doll will not work.


Step 4

Make another ball of bubble wrap …


… and stuff it in the round top, in order to keep the weights in place.


Step 5

Place the toothpick on the lower part of the head, like in the picture.


Step 6

Roll up the rest of the bubble wrap around the toothpick…


… and fix it on top of the other bubble wrap, on the round top.


Step 7

Take the colored cloth …


… and wrap it around the doll, keeping out the head.


Step 8

Tie the cloth with the ribbon, at the base of the head. Take care to let her hair out too.


The doll will look like that.


Step 9

Using the markers, draw eyes and mouth.


And that’s it.


Now try to put her down.


She will jump up …


… waiting to play with you.


And that is how you make your “I Don’t Want to Stay Down” Doll.  Try and knock her over and see what happens…. she pops right back up again ready to play some more.  Have fun!!

Technorati Tags: , , , , , , , , ,

How to Make a Handprints T-Shirt

I have a fun keepsake memory craft for you today.  I’m going to show you how to make a Handprints T-shirt.  This Handprint T-shirt craft is perfect for the end of school, birthday party, summer camp or anything that you want to remember your friends from.  All you need are a bunch of friends, a fresh T-shirt and some paint and you are good to go.  So, grab a bunch of your best of friends and the rest of the materials needed and let’s get this craft started.

Check out our other Keepsake Crafts.

(tutorial offered by Laura from Dacian Moon Handmade)


Materials Needed

– white T-Shirt
– paints
– marker (permanent or paint marker)
– paintbrush
– friends


Step 1

Prepare your T-Shirt.


Step 2

You and your friends paint your hands – you can use the paintbrush for that.


Step 3

Place your hand over the T-Shirt and… go!


That is my handprint…


… and the handprints of my 5 friends.


Step 4

You can write a remembering quote on your handprints and, of course, you must sign them.

Let the T-Shirt dry then you can wear it.


Doesn’t this Handprints T-shirt craft turn out amazing?  Imagine how wonderful it will be to wear the T-shirt that you and your friends help make together.  It is a wonderful way to remember your time with your friends.

Technorati Tags: , , , , , , , , ,

How to Make a Cute Stuffed Owl

If you love stuffed animals then you are going to love today’s craft.  I’m going to show you how to make a Cute Stuffed Owl.  You can decide to keep in for yourself or give it to one of your best friends to love.  Either way you can guarantee that people are going to love this stuffed owl… especially when they find out that you made it yourself.  So, grab the materials needed and let’s get started.

Laura from Dacian Moon Handmade will show you how to make this, step-by-step.


Materials Needed

– two different pieces of fabric (one smaller than the other) – in my case I used blue and grey.
– one small piece of red leather or felt
– scissors
– craft glue (optional)
– 2 white buttons
– stuffing material (I use some cotton pads)
– string and needles


Step 1

Draw a big triangle (with curved edges) on the blue fabric.


Draw a smaller triangle on the grey fabric.


Step 2

Cut the triangles out.


They should look like this.


Step 3

Place the right sides together…


… and stitch them.


Step 4

Force the left sides together and stitch them too.


This will cause the top of the body piece to come together …


… so sew that shut too.


Step 5

Turn the owl right-side-out …


… and fold down the top of the triangle. If you fold it lower, you’ll have a fatter and shorter owl. It will be taller and thinner if you fold it higher.  Secure this with a quick whip stitch.


Step 6

Cut a small triangle (with curved edges) out of the red leather.


Sew it or glue it on top of the fold.


Step 7

Sew the buttons on the sides of the beak…


… like this.


Step 8

Do a nice running gather stitch along the bottom of the owl, but don’t tie it yet.


Step 9

Prepare the stuffing material – I tore the cotton pads in small fluffy pieces.


Stuff your little bird so that it has a wonderfully squishy and cuddly softness to it.


Tie off the gather threads….


…and now you have a new cute friend to play with.


Isn’t this Stuffed Owl just simply cute?!  And, the cool part is that you made it yourself.  How did your stuffed owl turn out?  Let me know in the comments below.  And, don’t forget to add a picture of your owl to the comment too…. I would love to see it.

Technorati Tags: , , , , , , , , , , ,